Welcome to our beginner’s guide on editing modules in WordPress! If you’re just stepping into the world of WordPress, you might be wondering what modules are and why they’re essential for your site. Simply put, modules are reusable blocks of functionality that help enhance your website’s performance, design, and user experience. They can contain anything from content elements like images and text to functionality features like forms or sliders. Let’s dive deeper into the fascinating world of
Understanding the Different Types of Modules

WordPress modules, often referred to as “plugins” or “blocks” depending on their context, come in different flavors that cater to various needs. Let’s break them down:
- Content Modules: These include blocks for text, images, and videos that allow you to add various types of media to your posts and pages. Think of them as the building blocks of your content.
- Functional Modules: Such as contact forms, sliders, or galleries, these modules add dynamic capabilities to your site, enabling interaction with your visitors.
- Design Modules: Tools like page builders allow you to create visually stunning layouts. They often come with drag-and-drop functionality, making the process user-friendly.
- SEO Modules: Plugins that help optimize your site for search engines, ensuring that your content reaches a wider audience. Popular examples include Yoast SEO and All in One SEO.
- Commerce Modules: If you’re looking to set up an online store, eCommerce plugins like WooCommerce provide a range of functionalities to manage products, inventory, and payments.
By understanding these different types of modules, you’ll be better equipped to navigate and customize your WordPress site to fit your unique needs. Let’s get you started on editing these modules to create something truly special!
Accessing Your WordPress Dashboard

Alright, let’s jump right into it! The first step in editing a module in WordPress is accessing your WordPress dashboard. This might seem like a no-brainer, but let’s clarify how to get there if you’re new to the platform. Your
To access your dashboard, follow these simple steps:
- Open your web browser and head over to your website’s URL. Most of the time, you’ll just add
/wp-adminat the end of your site’s URL. For example,www.yoursite.com/wp-admin. - You’ll be prompted to enter your username and password. These are the credentials you set up when you installed WordPress.
- After entering your details, click the Log In button.
Once you’re logged in, you’ll see the dashboard. It can look a bit overwhelming at first, but don’t worry! Everything is neatly organized into menus and sections. You’ll find the main menu on the left side, featuring options like Posts, Pages, Media, and more.
Getting familiar with your dashboard is key. Spend some time exploring different sections. Feel free to click around; it’s all about getting comfortable with the interface. Once you feel at ease, you’ll be ready to tackle editing your modules!
Locating the Module You Want to Edit
Now that you’re in your WordPress dashboard, it’s time to locate the specific module you want to edit. Modules can refer to various elements, such as widgets, page sections, posts, or custom blocks, depending on how the website is structured. So, how do you efficiently find the right one? Let’s break it down step by step!
Here’s how you can locate your module:
- If your module is a part of a specific page or post, click on Pages or Posts from the left-hand menu.
- Scroll through the list to find the page or post that contains the module you want to edit. You can use the search bar at the top-right corner for quicker access.
- Once you find it, hover over the title, and you’ll see options like Edit and Quick Edit. Click on Edit.
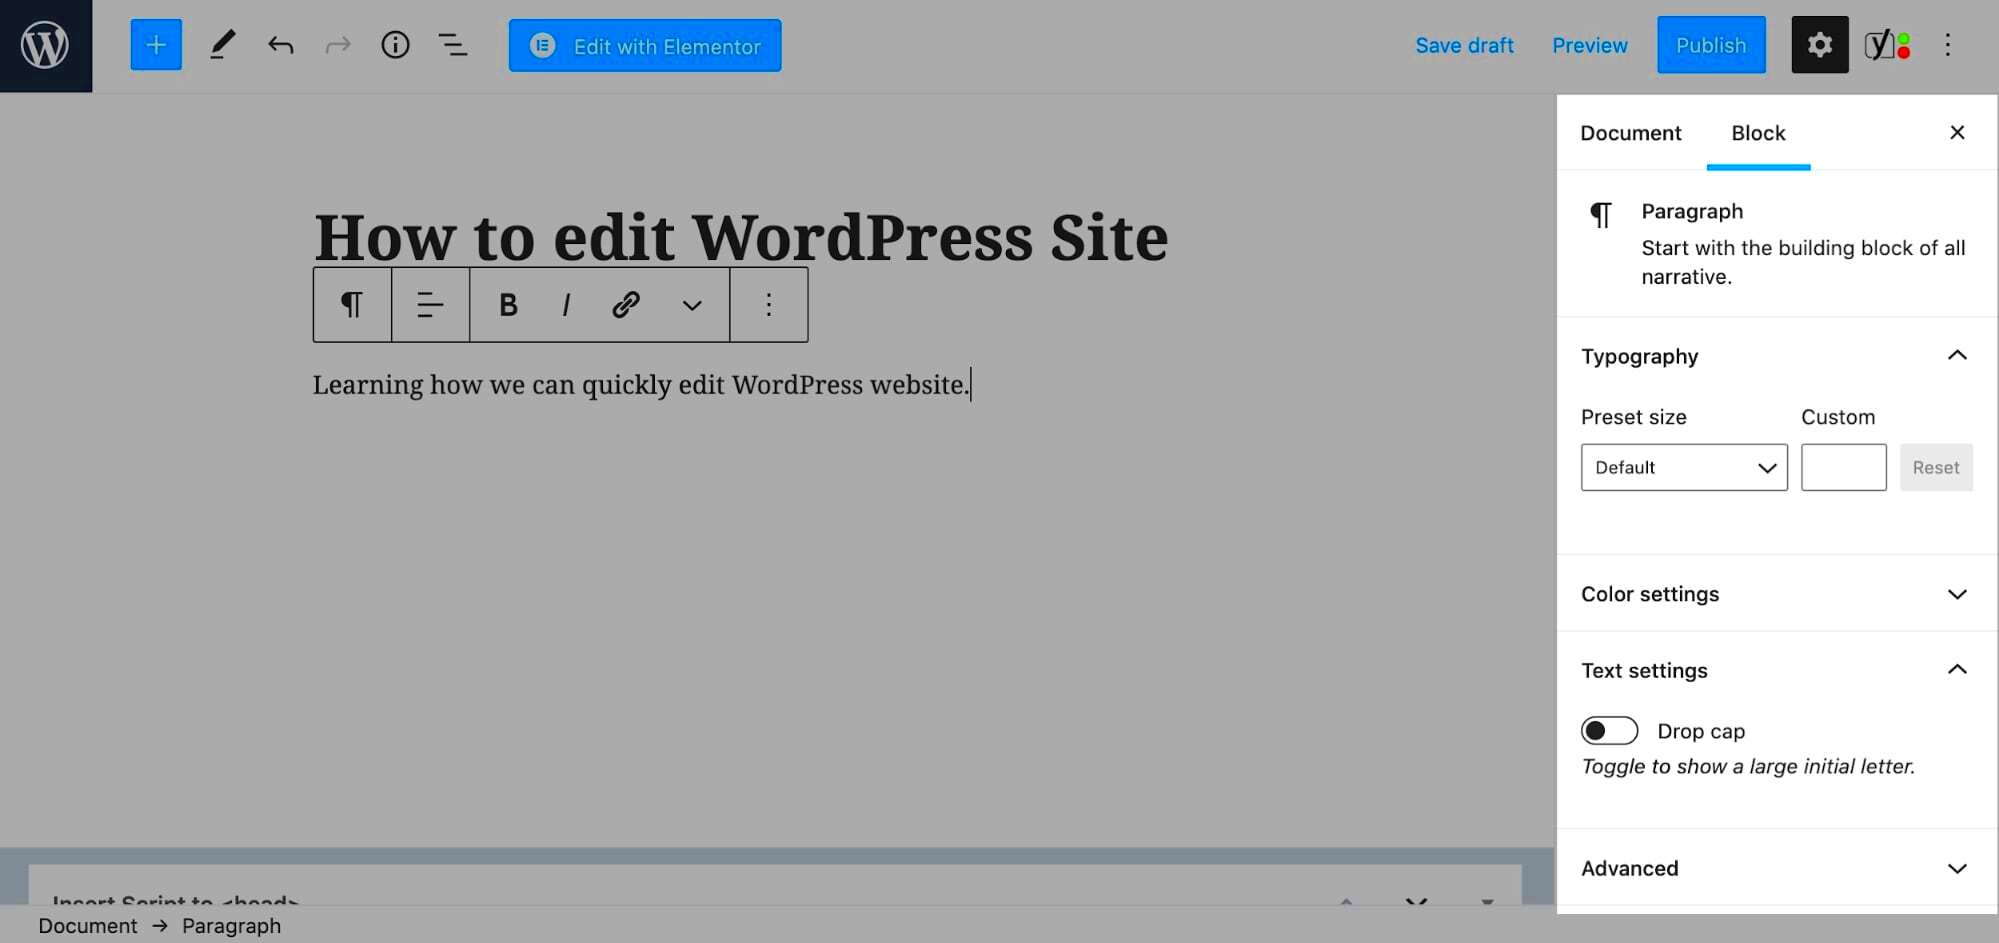
If you’re editing a module created with a page builder like Elementor or WPBakery, you might need to click on Edit with Elementor or the corresponding page builder name instead. This will lead you to the visual editing environment where you can see the modules laid out as they appear on the website.
For more complex modules that aren’t linked to a specific page or post, you might find them under Appearance > Widgets or Theme Options. Don’t hesitate to explore these sections as well. And remember, if you can’t find the module right away, just take a deep breath and keep looking; it’s all part of the learning process!
Editing Module Settings and Content
Editing a module in WordPress can be a straightforward process, especially when you understand the different elements involved. First, let’s clarify what a module is. In WordPress, a module could refer to any element on your page, particularly when you’re using a page builder. These can range from text blocks, images, buttons, to more complex features like sliders or galleries.
To begin editing a module, the first step is to locate the page or post where your module resides. Once you find it, click on the Edit button to access the WordPress editor. Depending on the page builder you’re using, you may see a visual editor displaying your content directly on the page. Click on the specific module you want to modify.
Here’s what you typically can do:
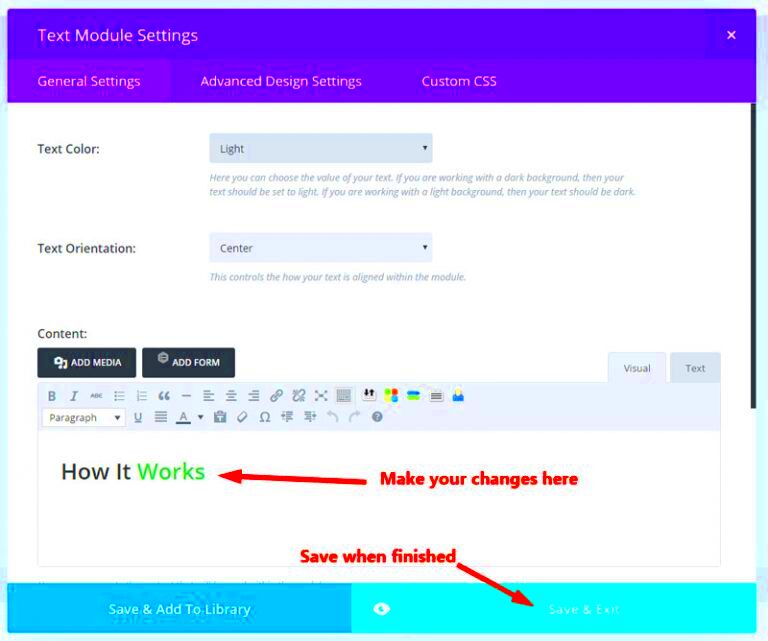
- Change Text: Click on a text module to update the content. You can also style it using different fonts, sizes, and colors.
- Adjust Images: For image modules, you can upload a new image, edit alt text for SEO, and resize as necessary.
- Set Links: In button modules, you can easily change the URL the button leads to.
- Custom Settings: Different modules come with their own set of settings. Explore options like spacing, background colors, and other design settings that can enhance the look of your module.
After you’ve made all the necessary edits to your modules, you’re almost ready to share your work with the world!
Saving and Previewing Your Changes
After you’ve poured your creativity into editing modules, the next crucial step is to save and preview your changes. This part is essential to ensure that everything looks and functions as you intended. Luckily, WordPress makes this process quite user-friendly.
Once you are satisfied with your edits, look for the Save or Update button, typically located at the upper right corner of the editor. Clicking this button preserves all your modifications in the database. Always remember to save your changes frequently, especially after major edits, to avoid losing any progress.
Now, let’s talk about previewing. Most page builders offer a Preview option. This allows you to see how your page will look to visitors before it goes live. Here’s how you can preview your work:
- Click on the Preview button. A new tab will open displaying your page as it would appear live.
- Navigate through your page just like a user would, checking each module for any necessary adjustments.
- Take a moment to appreciate your hard work and see how the modules interact with each other.
If you find any issues during the preview, simply return to the editor, make your changes, and go through the saving and previewing process again. With a bit of practice, you’ll become comfortable and efficient in editing modules on your WordPress site!
Best Practices for Editing Modules
Editing modules in WordPress can be a straightforward process, especially if you keep a few best practices in mind. Following these tips not only ensures that your changes are effective but also helps in maintaining your site’s performance and security.
- Backup Your Site: Before making any changes, always backup your WordPress site. This way, if anything goes wrong during the editing process, you can easily restore your site to its previous state.
- Use a Staging Environment: Consider making edits in a staging environment first. A staging site allows you to test changes without affecting your live site.
- Document Your Changes: Keeping a log of what you edit, including dates and reasons for changes, is invaluable. This documentation helps you track modifications and can prevent future confusion.
- Keep It Simple: If you’re new to WordPress, avoid overly complex changes. Focus on small tweaks, and as you become more comfortable, gradually take on bigger edits.
- Always Preview: Utilize the preview function! Before you publish changes, take advantage of the preview option to see how your edits will look on the front end.
- Stay Updated: Make sure your WordPress version, themes, and plugins are up to date. Outdated software can lead to compatibility issues when editing modules.
By adhering to these best practices, you will not only enhance the editing experience but also create a more robust and reliable WordPress site.
Troubleshooting Common Issues
Even with the best practices in place, issues can arise when editing modules in WordPress. Here’s a guide on how to troubleshoot some of the most common problems you might encounter:
| Issue | Possible Causes | Solutions |
|---|---|---|
| Changes not showing up | Cache issues or browser refresh needed | Clear your browser cache and refresh the page. You may also need to clear any caching plugins running on your site. |
| Layout breaks after editing | Conflicting CSS or HTML | Check your code for errors and revert any changes until the layout is back to normal. |
| Plugin conflict | Recent updates or new plugins installed | Deactivate all plugins and then reactivate them one by one to locate the conflict. |
| Slow website performance | Heavy modules or unoptimized images | Optimize images for the web and consider removing unnecessary modules to enhance speed. |
| Error messages | Incorrect code or poorly coded plugins | Deactivate the problematic plugins or correct the code. Consult support if unsure. |
With this troubleshooting guide, you can tackle common issues that might arise when you’re editing modules. Remember that patience and a methodical approach are your best friends in navigating WordPress mishaps!
Conclusion and Further Resources
Editing a module in WordPress can initially seem daunting for beginners, but with the right tools and understanding, you can customize your site effectively. Whether you’re looking to update text, change images, or modify layouts, the steps outlined in this guide will equip you with essential skills. Remember that regular backups and practicing on test environments can help prevent any unintended changes to your live site. To further enhance your WordPress knowledge, here are some valuable resources:
- WordPress Codex: The official documentation that covers everything from basic to advanced topics. Visit Now
- WPBeginner: A comprehensive guide for WordPress beginners that offers tutorials, tips, and resources. Visit Now
- WordPress YouTube Channel: Visual learners can benefit from tutorials and walkthroughs directly from the source. Visit Now
- Theme and Plugin Documentation: Always check the documentation for your specific theme or plugins for tailored guidance.
- Online Forums: Engage with the WordPress community on forums such as the WordPress Support Forums or Stack Overflow for specific queries and troubleshooting.
By leveraging these resources, you can continue to grow your skills and become more proficient in WordPress. Don’t hesitate to explore different modules and experiment with various settings; practice is key to mastering your WordPress experience.


