As a WordPress site owner, securing your website is one of your top priorities. One way to enhance your security is by restricting login page access to specific IP addresses. This process not only helps in safeguarding your site from unauthorized access but also minimizes the risk of brute force attacks. In this article, we’ll dive into the reasons why you should consider restricting IP addresses for your WordPress login page and outline the benefits of implementing this security measure.
Why Restrict IP Addresses on Your WordPress Login Page?

Restricting IP addresses on your WordPress login page is not just a tech-savvy maneuver; it’s a smart move to bolster your website’s defenses. Here are several compelling reasons to implement this practice:
- Enhanced Security: By allowing only trusted IP addresses, you drastically reduce the chances of attacks from unknown or malicious sources.
- Reduction in Brute Force Attacks: Limit the number of login attempts from unauthorized IPs. This measure helps in deterring bots and hackers targeting your login page.
- Improved Site Performance: Fewer unwanted login attempts lead to less server load, which can improve your website’s performance and speed.
- Access Control for Team Members: If your team only works from specific locations, you can allow access solely from their designated IPs, reducing unnecessary risk.
- Getting Notifications: Some security plugins notify you of unauthorized login attempts from blocked IPs, allowing you to take further action if necessary.
In summary, restricting login page IP addresses can significantly enhance the security of your WordPress site while streamlining access for your trusted users. It’s a simple yet powerful way to keep potential threats at bay.
How to Restrict IP Addresses Using .htaccess

One of the most effective ways to restrict IP addresses on your WordPress login page is by utilizing the .htaccess file. This method is particularly useful because it allows you to add a layer of security directly to your server configuration. But before we dive in, make sure to back up your .htaccess file. Any mistakes here can lead to accessibility issues on your site!
Here’s a simple step-by-step guide to help you restrict IP addresses using the .htaccess file:
- Access Your .htaccess File: You can find the .htaccess file in the root directory of your WordPress installation. Use an FTP client or your hosting provider’s file manager to access it.
- Make a Backup: Before making any changes, download a copy of your .htaccess file. This will ensure you can restore it if something goes wrong.
- Add IP Restrictions: Open the .htaccess file in a text editor and add the following code to restrict access:
RewriteEngine OnRewriteCond %{REQUEST_URI} ^/wp-login\.phpRewriteCond %{REMOTE_ADDR} !^YOUR-IP-ADDRESS$RewriteRule ^.*$ - [F,L]Replace YOUR-IP-ADDRESS with the IP address you want to allow. You can add more IP addresses by copying the RewriteCond %{REMOTE_ADDR} !^YOUR-IP-ADDRESS$ line underneath.
Finally, save the changes and upload the modified .htaccess file back to your server. It’s that simple! Always test your login page after making changes to ensure everything is functioning correctly.
Using a Security Plugin to Manage IP Restrictions
If you’re not comfortable diving into your .htaccess file or just prefer a more user-friendly approach, using a security plugin is a great alternative. There are numerous WordPress security plugins available that allow you to manage IP restrictions easily and efficiently.
Here’s how you can set up IP restrictions using a security plugin:
- Select a Security Plugin: Popular options include Wordfence, Sucuri Security, and iThemes Security. Choose one that suits your needs and budget.
- Install and Activate: Go to your WordPress dashboard, navigate to Plugins > Add New, search for your chosen plugin, and click “Install Now” followed by “Activate.”
- Configure IP Restrictions: Most plugins have a dedicated section for managing IP addresses. For example, in Wordfence, you can go to “Firewall” and find the option to block specific IP addresses.
Once you’re in the IP blocking section, you can:
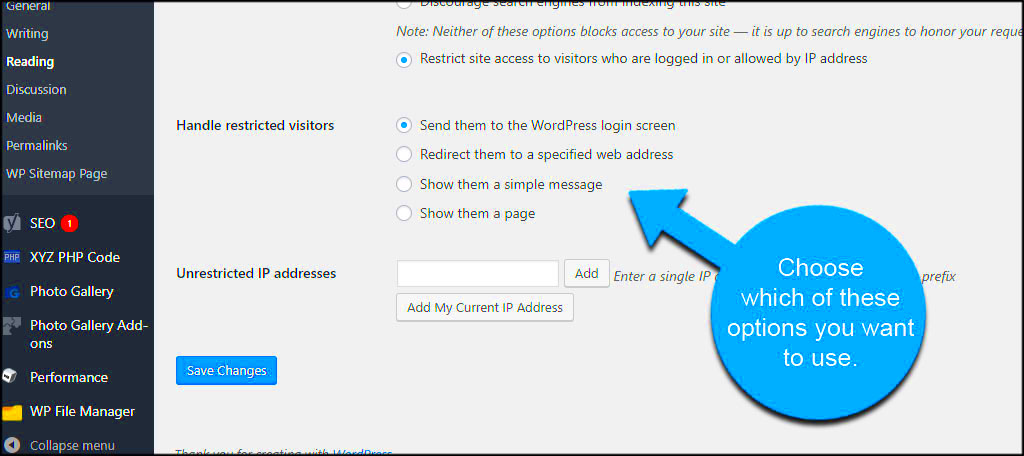
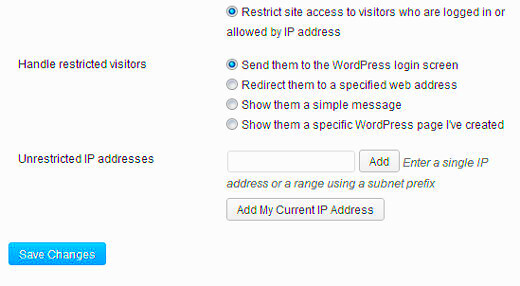
- Add trusted IP addresses that are allowed to access your login page.
- Block suspicious or unwanted IP addresses to enhance security.
Tip: Many security plugins also log login attempts, which can help you identify potential threats or malicious IP addresses to block.
Managing IP restrictions through a security plugin not only simplifies the process but also offers additional features like two-factor authentication, malware scanning, and more, keeping your website even more secure!
Whitelist Trusted IP Addresses
One of the most effective ways to secure your WordPress login page is by whitelisting trusted IP addresses. This means that only specific, known IP addresses can access your login page, while all other IPs will be blocked. It’s a simple yet powerful method that can greatly reduce the risk of unauthorized access.
Here’s how to get started with whitelisting:
- Identify Your Trusted IPs: Start by identifying the IP addresses that you regularly use to access your WordPress site. This might include your home or office IP address and possibly those of trusted team members.
- Access Your Site’s .htaccess File: You’ll need to add rules in the .htaccess file, which is a configuration file used by Apache web servers. Make sure to back up this file before making changes. You can find it in the root directory of your WordPress installation.
- Add Whitelist Rules: Use the following format to block all IPs except those you trust:
order deny,allowdeny from allallow from xxx.xxx.xxx.xxxallow from yyy.yyy.yyy.yyyReplace xxx.xxx.xxx.xxx and yyy.yyy.yyy.yyy with your trusted IP addresses. You can add multiple allow from lines for additional IPs.
Keep in Mind: If you frequently access your site from different locations, consider adding a dynamic IP management solution or a VPN service. This way, you won’t lock yourself out if your IP changes. Overall, whitelisting trusted IP addresses is a straightforward approach that can add an essential layer of security to your WordPress site.
Implementing Geo-Blocking Techniques
Geo-blocking is a strategy that blocks access to your WordPress site based on geographical locations. Simply put, if your business is only targeting certain regions or countries, you can restrict login attempts from everywhere else. This technique adds an additional layer of security by reducing the chances of unauthorized access from unknown areas.
Here’s how to implement geo-blocking:
- Select a Geo-Blocking Plugin: First, you’ll want to choose a reliable WordPress plugin that supports geo-blocking. Popular options include Wordfence, IP2Location, and iThemes Security.
- Configure Plugin Settings: Once you’ve installed your chosen plugin, navigate to the settings page. From there, you can typically find an option for geo-blocking. You can either block specific countries or allow only users from certain locations.
- Monitor Access Logs: Most plugins come with logging features that allow you to keep an eye on your site’s access patterns. This helps you fine-tune your geo-blocking settings and determine if you need to make adjustments.
Caution: Be mindful that geo-blocking might inadvertently block legitimate users, especially if they are traveling or using a VPN. Therefore, always review the access logs and adjust your settings accordingly.
In summary, geo-blocking can be an effective method to safeguard your login page. By limiting access based on geographic location, you’re not only reducing the number of brute-force attacks but also enhancing your site’s overall security posture.
Monitoring Login Attempts and Adjusting Restrictions
Once you’ve implemented IP address restrictions on your WordPress login page, it’s crucial to continuously monitor login attempts. Keeping an eye on who is trying to access your site can help you identify any unusual activity that might indicate unauthorized attempts or potential attacks.
Monitoring login attempts can be as simple or as sophisticated as you want it to be. You might start with basic methods such as:
- Checking Server Logs: Your web hosting provider usually offers access logs that can show all attempted logins. Reviewing these logs regularly will help you pinpoint unauthorized access attempts.
- Using WordPress Plugins: There are various plugins available that automatically log login attempts. Tools such as Wordfence or iThemes Security offer robust monitoring features, alerting you of failed attempts and suspicious activity.
Once you gather this information, make it a habit to adjust your restrictions as needed. For instance, if you notice repeated login attempts from a specific IP address, you might consider adding that IP to your block list. Conversely, if you’ve blocked an IP that turns out to be legitimate, don’t hesitate to remove it from the block list!
It’s also worth noting that you can set temporary bans for repeated failed login attempts. This can help protect your site from brute force attacks without permanently restricting valid users. Always review your limitations and be flexible with your approach, especially if you have a legitimate user base that may occasionally get blocked.
Conclusion
Restricting login page IP addresses in WordPress is a powerful step in securing your website from unauthorized access. While it might seem like an added hassle at first, it ultimately strengthens your defense against potential threats.
In summary, here are the key points to consider:
| Key Points | Description |
|---|---|
| IP Address Restrictions | Control who can log in by allowing only specific IP addresses. |
| Monitoring | Keep track of login attempts and adjust restrictions as necessary. |
| Use of Plugins | Enhance monitoring and security with the help of WordPress security plugins. |
| Flexibility | Regularly revisit your restrictions, allowing legitimate users while blocking threats. |
With diligent monitoring and occasional adjustments, you can protect your WordPress site effectively. Staying proactive in safeguarding your website is essential in today’s digital age! So, go ahead, put these strategies into action, and enjoy a more secure login experience for you and your users.


