Welcome to the world of Azure Active Directory (Azure AD) authentication! In today’s fast-paced digital landscape, securing your online platforms is more important than ever. Azure AD allows you to implement a streamlined, secure login process for your WordPress site by integrating it with Microsoft’s powerful identity management service. This guide will walk you through the process step-by-step, simplifying what can sometimes seem like a daunting task. Whether you’re a seasoned developer or just starting with WordPress, Azure AD authentication can enhance the security and user experience of your website.
Prerequisites for Setting Up Azure AD Authentication
Before diving into the setup process, there are some essential prerequisites you’ll need to consider. Gathering these items in advance will save you time and ensure a smooth integration. Here’s what you’ll need:
- An Active Azure Subscription: You must have an Azure account with a subscription. If you don’t have one, you can sign up for a free account!
- Azure Active Directory: You’ll need access to Azure AD, which is included in most Azure subscriptions. Ensure you have the necessary permissions to create and manage app registrations.
- WordPress Installation: Make sure you have a working WordPress site. Whether it’s hosted on a local server or a live environment, it’s critical for testing the integration.
- Administrator Access: Ensure you have admin privileges on your WordPress site. This access will allow you to install plugins and make necessary changes.
- Azure AD Integration Plugin: Identify a suitable plugin for Azure AD authentication. There are several options available, such as the “WP Azure AD” plugin, designed for seamless integration.
Once you have these prerequisites in place, you’re all set to start configuring Azure AD for your WordPress login. Let’s move on to the actual setup process!
Creating an Azure AD Application
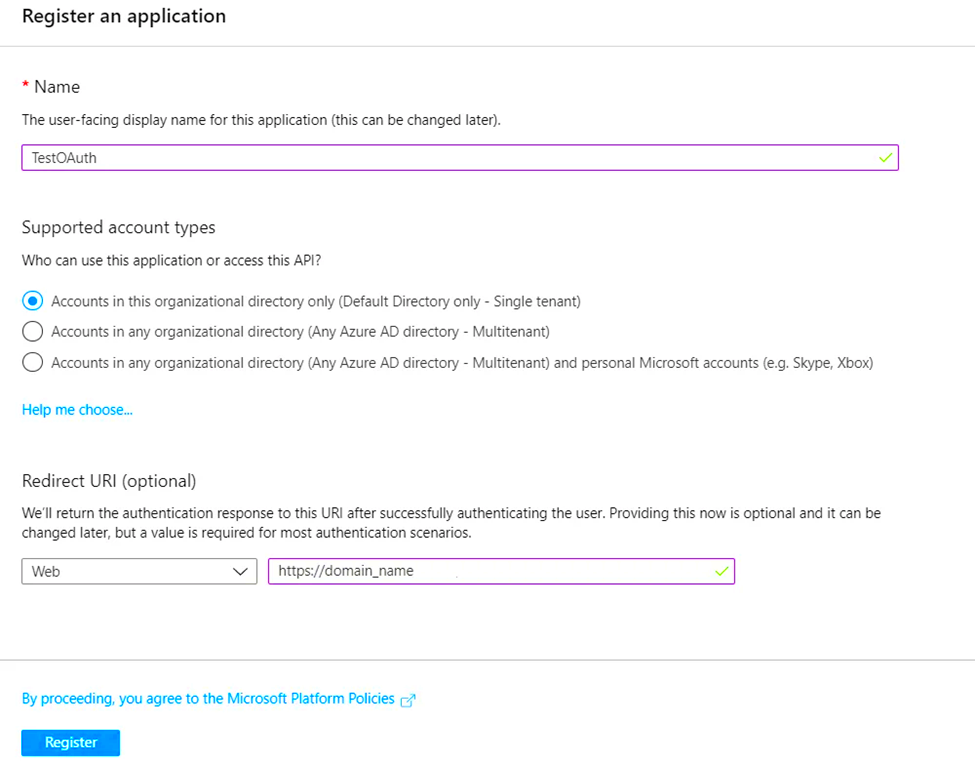
Creating an Azure Active Directory (Azure AD) application is an essential step when setting up Azure AD authentication for your WordPress login. This application will serve as the bridge that connects your WordPress site to Azure AD, enabling users to log in using their Azure credentials. Let’s walk through the process step by step!
- Access the Azure Portal: Start by logging into the Azure Portal. Make sure you have the necessary permissions to create applications.
- Navigate to Azure Active Directory: Once logged in, locate the left-hand menu and click on “Azure Active Directory.” This section manages everything related to your organization’s directory.
- Create a New Application: Click on “App registrations” and then select the “+ New registration” button. This is where you’ll set up a new application.
- Fill Out Application Details: You’ll need to provide a name for your application. Choose a name that’s recognizable, such as “WordPress Login.” Under “Supported account types,” choose the appropriate option based on who will be using your app. For most WordPress sites, “Accounts in this organizational directory only” works well.
- Redirect URI: For the redirect URI, enter your WordPress login URL, usually in the format:
https://yourwebsite.com/wp-admin/admin-ajax.php. This ensures that users return to the login system correctly. - Register the Application: Click the “Register” button, and voilà! You have successfully created an Azure AD application.
Once your application is created, make sure to note down your Application (client) ID and Directory (tenant) ID. You’ll need these details for configuring your Azure AD settings and integrating with WordPress.
Configuring Azure AD Settings
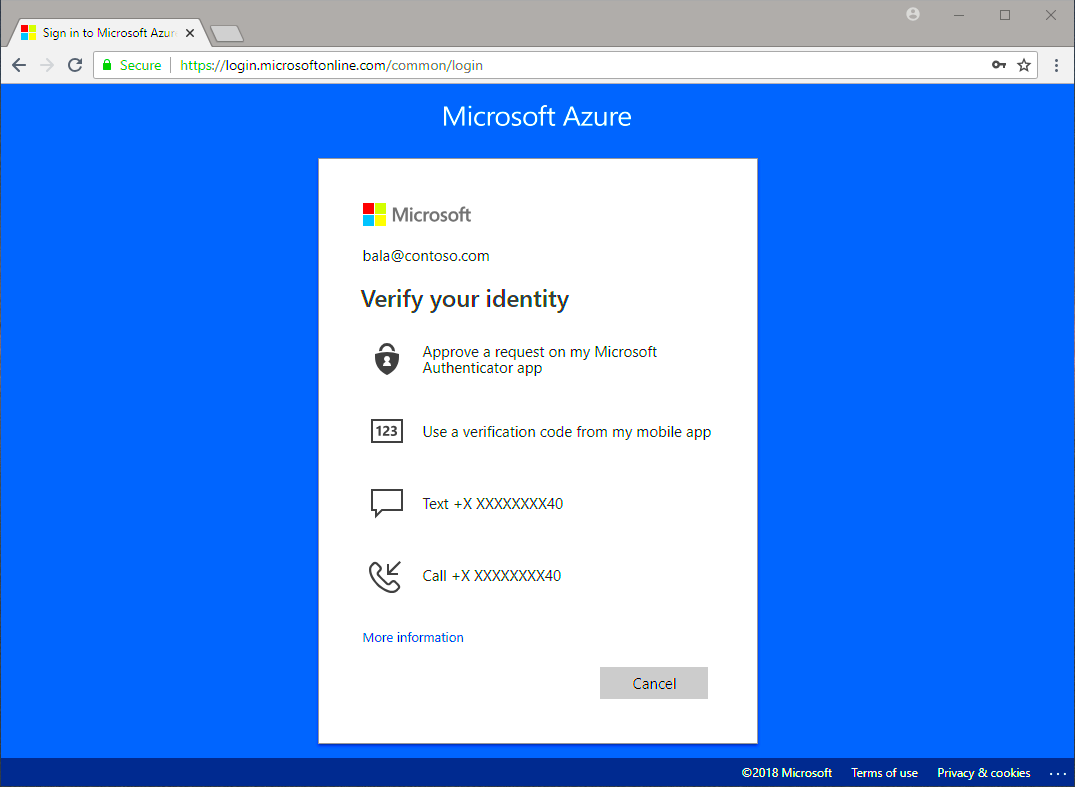
After creating your Azure AD application, the next vital step is configuring the Azure AD settings. This ensures that your application can communicate properly with your WordPress site and manage authentication smoothly. Let’s dive into these configurations!
- Client Secret: In your Azure portal, navigate to “Certificates & secrets” on the left sidebar. Click on “+ New client secret.” Provide a description and select an expiration period. Make sure to save the Value from the generated client secret, as you’ll need it later in your WordPress configuration.
- API Permissions: Under “API permissions,” click on “Add a permission,” then select “Microsoft Graph.” Choose “Delegated permissions” and add permissions like
openid,profile, andemail. These permissions will give your application access to user profile data which is essential for authentication. - Configure Redirect Implicit Flow: Ensure that you’ve enabled the appropriate redirect URIs. In the “Authentication” section, check the box for “Allow public client flows,” enabling the implicit grant flow; this is essential for many WordPress setups.
- Set Up Branding: While optional, enhancing user experience by customizing the application branding can be beneficial. Under “Branding,” you can upload a logo, set background images, and modify the sign-in experience for compatibility with your site’s theme.
- Verify Configuration: Always verify your configurations. It’s a good idea to test logins using a couple of different Azure AD accounts to ensure everything works smoothly.
With these configurations, your Azure AD authentication setup for WordPress will be robust and ready to go! It streamlines the user experience and enhances your site’s security by allowing employees or users to log in without multiple sets of credentials.
Installing the Necessary Plugins in WordPress
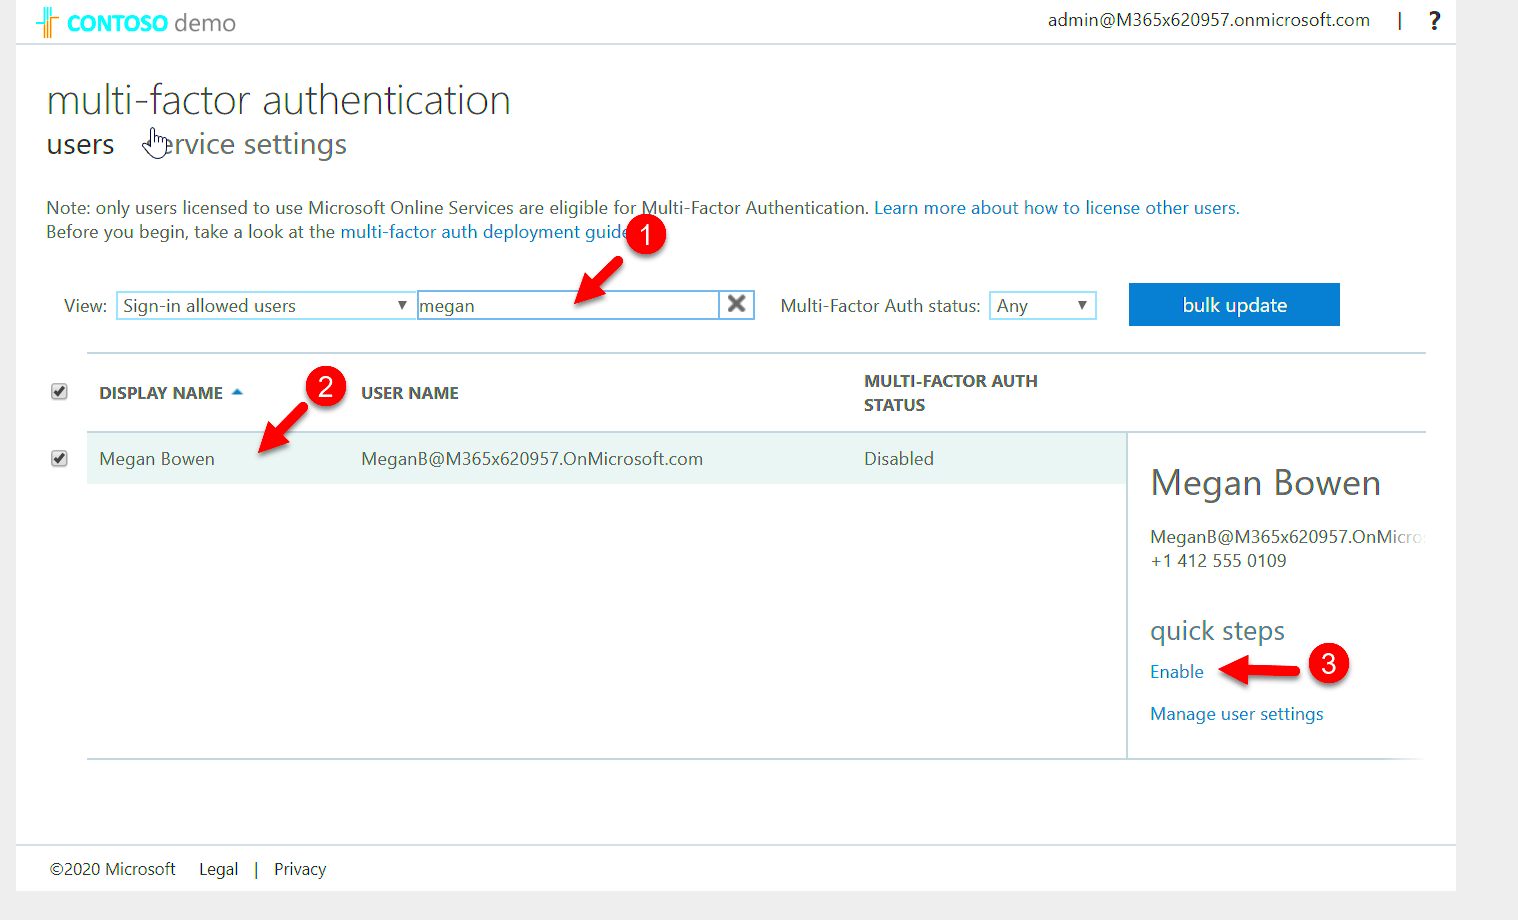
To get started with Azure AD Authentication for your WordPress login, the first step is to install the necessary plugins. These plugins will bridge the gap between your WordPress site and Azure Active Directory, allowing for a seamless authentication process. Let’s break this down step-by-step.
1. Access Your WordPress Dashboard: – Log in to your WordPress admin panel by navigating to yourdomain.com/wp-admin.
2. Navigate to Plugins: – On the left sidebar menu, look for the Plugins option. Click on it.
3. Add New Plugin: – Once you’re in the Plugins area, click on the Add New button at the top of the page.
4. Search for Azure AD Plugins: – In the search bar, type in Azure Active Directory or Azure AD B2C to locate the plugins suitable for authentication.
5. Recommended Plugins: Here are a couple of highly-rated plugins you might consider:
- Microsoft Azure AD Log In: A popular plugin that provides OAuth authentication capabilities.
- WP Azure AD: Allows users to authenticate using Azure AD credentials easily.
6. Install and Activate: – After identifying a plugin, click the Install Now button. Once the plugin is installed, the button will change to Activate. Click on it to activate the plugin.
And that’s it! You’ve successfully installed the necessary plugins for enabling Azure AD authentication on your WordPress site.
Setting Up Azure AD in WordPress
Now that you’ve installed the necessary plugins, the next step is to set up Azure Active Directory within your WordPress site. This process involves configuring Azure AD settings and connecting your WordPress site to your Azure account. Follow these steps closely:
1. Log In to Azure Portal: – Start by logging into your Azure portal at portal.azure.com.
2. Create an Azure AD Application: – Navigate to Azure Active Directory in the left-hand menu. – Click on App registrations, then select New registration.
3. Fill in Application Details: – Provide a recognizable name for your application, like “WordPress Login”. – Set the Redirect URI where Azure will send users after authentication. This should be your WordPress site URL followed by the specific endpoint provided by the plugin.
4. Configure API Permissions: – After creating the application, click on API permissions. – Add the necessary permissions for the plugin to interact with Azure AD.
5. Set Up Client ID and Secret: – After setting API permissions, go to Certificates & secrets. – Generate a new client secret to use in the WordPress plugin.
6. Copy Essential Information: – Make sure you save your Application (Client) ID, Directory (Tenant) ID, and Client Secret. You’ll need these to configure your WordPress plugin.
7. Configure WordPress Plugin: – Now, return to your WordPress dashboard and navigate to the settings of the plugin you installed. – Here, enter the Client ID, Client Secret, and any other details required by the plugin to connect with Azure AD.
Once you’ve configured the settings, save the changes, and you’re all set! Your WordPress site is now ready to authenticate users using Azure Active Directory, achieving a seamless login experience.
7. Testing the Azure AD Login
Once you’ve successfully integrated Azure Active Directory (Azure AD) for your WordPress login, it’s essential to test the setup to ensure everything functions properly. Testing is a crucial step, as it allows you to confirm that users can log in seamlessly and that the authentication process works as intended.
Here’s how you can go about testing the Azure AD login:
- Create a Test User: Before you dive into testing, create a sample test user in your Azure AD. This can be a dummy account that mimics the privileges of the typical user.
- Log in to WordPress: Go to your WordPress login page. You should see an option to log in with Azure AD. Click on this link.
- Enter Credentials: Use the test user account credentials you created earlier to log in. This is the moment of truth, so pay attention!
- Verify Redirects: After a successful login, ensure you are redirected back to your WordPress dashboard or homepage as expected.
- Check User Role and Permissions: Confirm that the user role assigned in Azure AD matches what you’ve set in WordPress. Does the test account have the correct access rights?
This process not only verifies that Azure AD authentication is functioning correctly but also ensures that the user experience is smooth and intuitive. If you encounter any issues during this testing phase, don’t worry—there are troubleshooting steps that will help you out.
8. Troubleshooting Common Issues
Even with the best planning, issues can sometimes arise when setting up Azure AD for your WordPress login. The key is to stay calm and work through these problems methodically. Below are some common issues you might face, along with their potential solutions.
| Issue | Potential Solution |
|---|---|
| Login Button Missing: | Check your WordPress login page settings to ensure the Azure AD plugin is activated and configured properly. |
| Authentication Failed: | Verify that the credentials you are using are correct. Also, check Azure AD settings for any restrictions. |
| Redirect Issues: | Ensure the redirect URL in Azure AD matches the URL used by your WordPress site. Any discrepancies can cause problems. |
| Permissions Error: | Review the user roles assigned in both Azure AD and WordPress to ensure they align. |
If you still find yourself scratching your head after attempting these fixes, consider consulting community forums or the Azure support team. Remember, troubleshooting can be a learning process, so don’t hesitate to seek help when needed!
9. Additional Security Best Practices
When it comes to securing your WordPress site using Azure AD authentication, there are several best practices you should keep in mind. Following these tips not only enhances your site’s security but also gives you peace of mind knowing your data is well-protected.
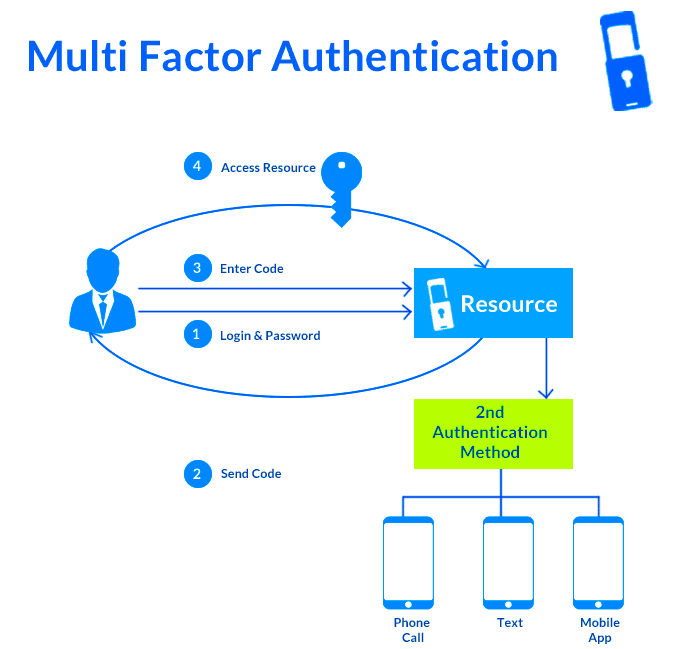
1. Enable Multi-Factor Authentication (MFA): Always enable MFA for added security during the login process. This extra layer requires users to verify their identity through a secondary method, like a text message or an authenticator app.
2. Use Conditional Access Policies: Azure AD allows you to set up conditional access policies that require specific requirements to be met before access is granted. For example, you can restrict access based on the user’s location or the device they’re using.
3. Regularly Update and Patch: Keep WordPress, your plugins, and themes up to date. Outdated software is often a target for cyber-attacks, so regular updates are crucial to maintaining a secure site.
4. Monitor User Activity: Keep an eye on user login attempts and account activities. Many security plugins can help you monitor and log this information effectively.
5. Limit User Privileges: Assign the minimum permissions necessary. Regular users shouldn’t have full admin access unless absolutely necessary. This reduces the risk of unintentional damage or unauthorized access.
6. Backup Regularly: Implement a reliable backup strategy. In the event of a security breach, having a recent backup can save you time and hassle when restoring your site.
7. Educate Your Users: Make sure that everyone with access to your WordPress site understands security best practices. Training your team to recognize phishing attempts and strong password requirements is vital.
By following these additional security best practices, you’ll significantly enhance the security posture of your WordPress site, ensuring a safer environment for you and your users.
10. Conclusion
In conclusion, integrating Azure AD authentication into your WordPress login process is indeed a smart move for enhancing security. Not only does it streamline the login experience for users who are already familiar with Azure AD, but it also offers a robust security framework to safeguard sensitive information.
Throughout this guide, we’ve covered the necessary steps for implementing Azure AD authentication, discussed the myriad benefits of this approach, and highlighted essential security practices to keep your site safe.
To recap, here are some key takeaways:
- Seamless User Experience: Users can log in with their existing Azure AD credentials—no need to remember yet another password!
- Enhanced Security Features: Features like MFA and conditional access make your login process significantly more secure.
- Regular Maintenance and Updates: Keeping your WordPress environment updated is paramount for ongoing security.
As you embark on this journey toward fortified security, don’t hesitate to explore the extensive features offered by Azure AD. By following best practices and remaining vigilant, you’ll ensure that your WordPress site remains a secure and welcoming space for all users.
Thank you for joining us on this step-by-step guide! If you have any questions or need further assistance, feel free to reach out or leave your comments below. Happy blogging!


