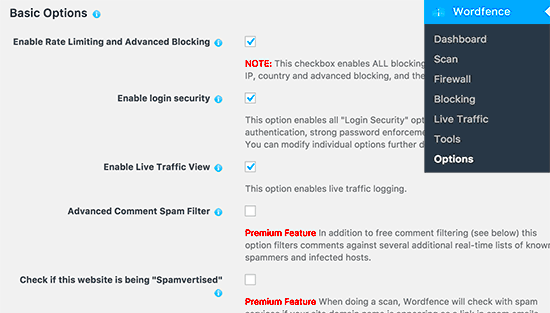
Wordfence is a powerful security plugin for WordPress that acts as a protective shield for your website. With it installed, you gain access to a robust suite of tools designed to safeguard your site against a myriad of threats, including malware, hacking attempts, and spam. It offers features such as a firewall, malware scanner, and login security, making it an essential component of WordPress site management. In today’s digital age, where cyber attacks are increasingly common, having a security plugin like Wordfence is not just beneficial; it’s crucial for protecting your online presence.
Understanding the Need to Pause Wordfence
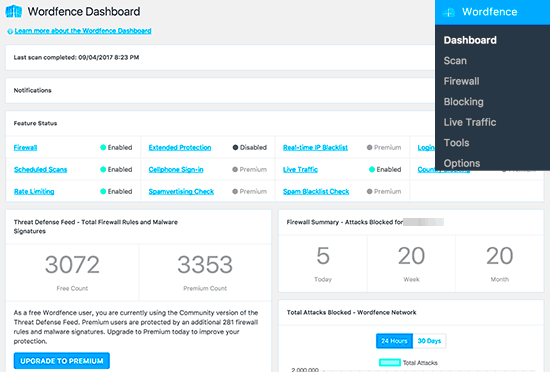
While Wordfence is an invaluable tool for enhancing your website’s security, there are specific scenarios where you might need to pause it temporarily. Here are some situations where pausing Wordfence is beneficial:
- Plugin or Theme Uploads: When updating or installing plugins and themes, Wordfence may flag these actions as suspicious, preventing proper uploads.
- Site Cleanup: If you’re making significant changes to your site, such as migrating or troubleshooting, pausing Wordfence can streamline the process.
- Performance Improvements: In some cases, Wordfence can slow down your site if it’s overly restrictive. Temporarily pausing it can help identify performance issues.
- Development and Testing: When developing new functionalities or testing website updates, you may need to pause security features to avoid false positives.
How long should you pause it? It’s best to keep the pause as brief as necessary. Once your tasks are complete, reactivating Wordfence is essential to maintain your site’s security. Always ensure that your security measures are back in place to fend off any potential threats!
Steps to Pause Wordfence in WordPress
Pausing Wordfence is straightforward, and it’s especially handy when you’re making significant updates or uploads to your WordPress site. Here’s how you can do it step-by-step:
- Log into Your WordPress Admin Dashboard: Go to your website’s URL and append “/wp-admin” to the end. Enter your username and password to access the admin area.
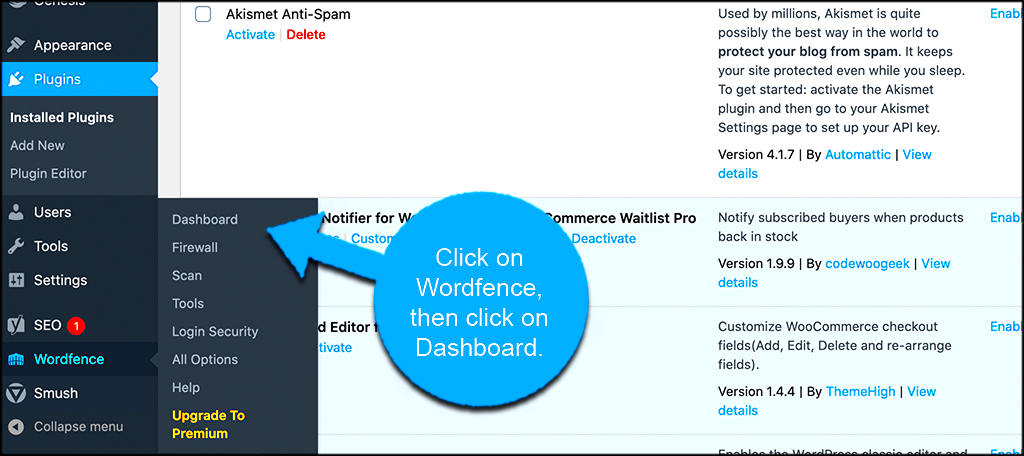
- Navigate to Wordfence: On the left-hand sidebar, look for the “Wordfence” option. Click on it to access the plugin’s dashboard.
- Go to the Firewall Settings: In the Wordfence options, find and click on “Firewall”. This section is where you can manage the security measures you’ve set up.
- Pause Protection: Within the firewall settings, look for a button that says “Pause.” It’s usually clearly labeled for quick access. Click on it, and you’ll typically see a confirmation prompt.
- Select Duration: You can choose how long you want Wordfence to be paused. Options often include 30 minutes, an hour, or until you manually resume protection. Pick your desired duration.
- Confirm the Action: After selecting the duration, confirm your choice. Wordfence will now be paused for the time you specified. You should see a notification indicating that protection is off.
And there you have it! You are now free to make updates or uploads without any interference from Wordfence. Just remember to resume your protection after completing your tasks!
Verifying Wordfence Pause Status
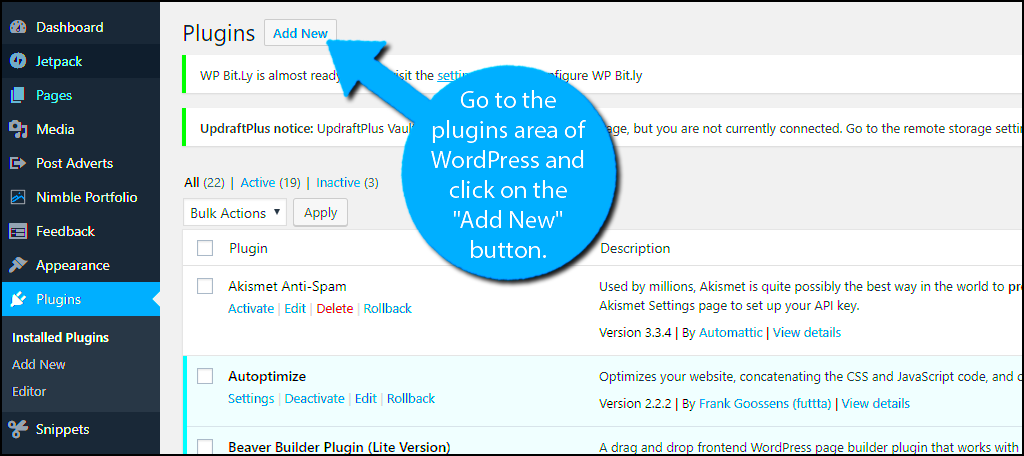
Verification that Wordfence protection has been successfully paused is an important step to ensure your site remains functional without any hiccups. Here’s how you can confirm the pause status:
- Check the Dashboard Notifications: After you’ve paused Wordfence, the dashboard usually shows a notification indicating that the firewall is currently inactive. Look for messages or alerts in the Wordfence dashboard.
- Revisit the Firewall Section: Go back to the “Firewall” settings where you paused the protection. There should be a clear status indicator showing that the protection is indeed paused. Check for any visual cues, like a red alert icon.
- Look for the Timer: If you selected a specific time duration for the pause, you might see a countdown timer. This ensures you’re aware of how long the protection will remain off.
- Test Your Site: Visit your website to perform any uploads or updates. If everything runs smoothly without restrictions, it’s a good sign that Wordfence is paused as intended.
- Check Email Notifications: If you’re subscribed to Wordfence’s alerts, check your email. You might receive a notification stating that the firewall has been paused. This is another solid confirmation.
Once you’ve verified that Wordfence is paused, you can proceed with your uploads without worrying about any security prompts. Don’t forget to keep an eye on the timer, so you know exactly when to reactivate your protection!
Tips for Safe Uploads During Maintenance
When you’re in the heat of making changes to your WordPress site, it’s easy to overlook some crucial safety nets. Here are some simple yet effective tips to ensure your uploads are not only successful but also secure.
- Backup Your Site: Before you begin any uploads, always create a full backup of your WordPress site. Use plugins like UpdraftPlus or BackupBuddy to make this process seamless.
- Check File Types: Ensure that the files you are uploading are from trusted sources and are of the correct types. For example, WordPress supports JPEG, PNG, PDF, and ZIP files among others. It’s crucial to avoid uploading executable files or any unknown formats that could introduce vulnerabilities.
- Use Staging Environments: Consider using a staging site for major uploads. This way, you can test changes without affecting the live site. If everything looks good after testing, then you can push the changes to your live environment.
- Limit User Access: While uploading, restrict access to your site to only those who need it. This minimizes the risk of unwanted changes or uploads during this sensitive period.
- Clear Cache: After completing the uploads, clear your cache (if you are using a caching plugin). This ensures that visitors are seeing the latest version of your site without old cached versions lingering around.
These tips not only facilitate safer uploads but also create a smoother maintenance process. Staying organized and vigilant is key!
How to Resume Wordfence After Uploads
After you’ve successfully uploaded your new files and configurations, it’s time to get Wordfence back in action. Here’s how you can easily resume the security features of this mighty plugin without a hitch.
- Log Into Your WordPress Dashboard: Navigate to your WordPress admin area by logging in as you normally would. This gives you access to all your settings.
- Go to Wordfence: On the left-hand menu, find and click on the ‘Wordfence’ option. This will lead you to the Wordfence dashboard where you can manage all its features.
- Reactivate Protection: Look for the ‘Firewall’ or ‘Options’ section and find the toggle or button that allows you to turn the protection back on. It might say “Resume Protection” or “Enable Firewall.” Click it!
- Run a Quick Scan: Once you’ve reactivated Wordfence, it’s wise to conduct a quick scan. This step helps identify any potential security issues that might have arisen during the upload.
- Check Alerts: Don’t forget to check the ‘Alerts’ tab to see if Wordfence has logged any unusual activity or security issues while it was paused.
By following these steps, you can ensure that your WordPress site is protected immediately after uploads. Remember, keeping your security measures active is just as important as making those exciting changes!
Troubleshooting Common Issues
When working with Wordfence in WordPress, it’s not uncommon to run into a few bumps along the road, especially when you’re looking to pause the plugin for uploads. Knowing how to troubleshoot common issues can save you time and ensure a smooth experience. Here are some common problems and practical solutions:
- Issue: Unable to Access Wordfence Settings
- Issue: Uploads Still Blocked Even After Pausing
- Server-side firewalls
- Other security plugins that might be conflicting
- Issue: Changes Not Saving
- Issue: Performance Drops
If you find yourself locked out of the Wordfence settings, you can temporarily disable the plugin via FTP. Navigate to the wp-content/plugins folder and rename the Wordfence directory to something like “wordfence-disabled.” This will deactivate the plugin, allowing you to regain access to your WordPress dashboard.
Sometimes, even when you’ve paused Wordfence, uploads can still be blocked. Make sure you’re not running into other security constraints imposed by your hosting provider. Check for:
If your settings changes aren’t saving, try refreshing the page or clearing your browser cache. Also, examine your user permissions to ensure you have the right access level to make changes.
If you notice a performance drop after making changes, consider restoring to a previous backup or adjusting your Wordfence settings to reduce the burden on server resources.
Conclusion and Best Practices
Pausing Wordfence during uploads is a simple yet crucial step to ensure that your site maintenance runs smoothly without interruption from security checks. However, it’s essential to approach this task with caution to maintain your site’s security integrity. Here are some final best practices to keep in mind:
- Backup Your Site Regularly
- Use a Staging Environment
- Monitor Your Site’s Security
- Be Informed About Plugin Updates
Before making significant changes or pausing security plugins, always back up your WordPress site. This ensures that you can recover if anything goes wrong.
If you’re planning to make major updates or changes, consider using a staging environment. This allows you to test without affecting your live site.
After you’ve finished your uploads, don’t forget to reactivate Wordfence and run a quick scan to identify any potential threats. Keeping your site secure should always be a top priority.
Keep abreast of any updates from Wordfence. Developers frequently release patches for bugs and vulnerabilities. Staying updated not only helps improve performance but also enhances security.
By following these practices, you’ll be able to manage your site’s security and functionality without any unnecessary hiccups. Happy uploading!

