WordPress has a neat little feature known as the “Trash” functionality, which is designed to help users manage their content with ease. Think of it as a safety net for your website. When you delete a post, page, or any other type of content, instead of being permanently erased, it gets moved to the Trash folder. This is pretty handy because it gives you a chance to recover content you might change your mind about later.
Here’s a quick rundown of how the Trash works:
- Temporary Storage: Deleted items remain in the Trash for 30 days before being permanently deleted.
- Easy Restoration: You can easily restore items from Trash with just a few clicks.
- Multiple Types of Content: Posts, pages, comments, and even media files can all be moved to the Trash.
- User Role Permissions: Depending on your user role, you may or may not have permission to delete certain content.
To access your Trash, just go to your WordPress dashboard, click on the relevant section (like Posts or Pages), and you’ll see a “Trash” link. Pretty simple, right? Understanding this functionality is essential to avoiding unnecessary panic when an error occurs during deletion.
Common Reasons for Errors When Moving Items to Trash

If you’ve been using WordPress for a while, you might have encountered some hiccups when trying to move items to the Trash. While it can be frustrating, it’s helpful to know what might be causing these issues. Here are some of the most common reasons for errors when moving items to Trash:
- Insufficient Permissions: Sometimes, your user role might not have the right permissions to delete certain items. Check your user role settings!
- Plugin Conflicts: Some plugins might interfere with the deletion process. Try deactivating plugins to see if the problem resolves.
- Theme Issues: A poorly coded theme could also be the culprit. Switching to a default WordPress theme temporarily can help diagnose the issue.
- JavaScript Errors: Look out for any JavaScript errors in your browser’s console; they can disrupt the functionality of your dashboard.
- Database Corruption: In rare cases, the database might have issues that prevent proper communication with your WordPress site, causing errors.
By identifying these common pitfalls, you can take steps to troubleshoot and overcome any frustrating errors when you’re trying to clean up your WordPress site. Happy blogging!
3. Step-by-Step Guide to Troubleshoot Trash Errors
When you encounter issues with moving items to the trash in WordPress, don’t panic! Troubleshooting can often be straightforward. Here’s a step-by-step guide to help you identify and resolve those pesky trash errors:
- Check User Permissions: Ensure you have the right permissions to delete items. Head to the Users section in the admin panel and confirm that your role allows item deletion.
- Clear Your Browser Cache: Sometimes, cached data can lead to conflict. Clear your browser cache by going into your browser settings and ensuring you refresh the page afterward.
- Review Error Logs: If the issue persists, review the error logs. You can usually find these in the Hosting Control Panel or through a WordPress plugin like Debug Bar.
- Update WordPress: Make sure you’re running the latest version of WordPress. An outdated version can lead to various operational hiccups. Check the Dashboard for updates.
- Database Repair: Sometimes, repairing your database can fix errant issues. To do this, you can include the following line in your wp-config.php file: define(‘WP_ALLOW_REPAIR’, true);. Then, access http://yoursite.com/wp-admin/maint/repair.php to perform the repair.
- Test with Different Browsers: It’s possible that the issue may reside in your current browser. Try accessing your WordPress site from a different browser to see if the problem persists.
After following these steps, you should have a better idea of what’s causing your trash issues and how to fix them!
4. Disable Plugins and Themes to Identify Conflicts
Sometimes, the root cause of your trash errors might be found in the plugins or themes you have activated on your WordPress site. Disabling them temporarily can help you pinpoint conflicts. Here’s how to go about it:
- Access Your WordPress Dashboard: Log in to your WordPress admin area.
- Disable Plugins: Go to the Plugins section. You can bulk deactivate by selecting all plugins and choosing Deactivate from the bulk actions dropdown. If the error disappears, reactivate each plugin one by one to identify the culprit.
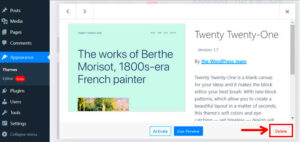
- Switch to a Default Theme: Navigate to Appearance > Themes, and switch to a default theme like Twenty Twenty-One. Check if moving items to trash works. If it does, your active theme may be the source of the problem.
- Reactivate Plugins and Theme: Once you find the conflicting plugin or theme, consider replacing it with a different one or seek support from the developer.
Keep in mind: Maintaining an organized WordPress setup can drastically reduce these kinds of errors. Regular audits of your plugins and themes keep your site running smoothly!
Check User Permissions and Roles
When you’re facing issues while trying to move items to the trash in WordPress, one of the first things you should check is the user permissions and roles. User roles in WordPress determine what actions each user can perform, and sometimes, these permissions can become a stumbling block.
WordPress has several built-in roles, including:
- Administrator: Full access to all site features and settings.
- Editor: Can manage and publish posts including those by other users.
- Author: Can publish and manage their own posts.
- Contributor: Can write and manage their own posts but cannot publish them.
- Subscriber: Can only manage their profile and read posts.
If you’re having trouble moving items to the trash, it could be that your user role does not have the necessary permissions. For instance, a Contributor can’t delete other users’ posts. To check your permissions:
- Log into your WordPress dashboard.
- Navigate to Users and find your account.
- Look at the role assigned to you.
If needed, consult the administrator to adjust your role or permissions. Tuning these settings might just resolve those pesky errors, allowing you to manage your items seamlessly!
Repairing the WordPress Database
Sometimes, when WordPress refuses to cooperate, the issue may lie within the database itself. A corrupted database can lead to various errors, including problems with moving items to the trash. Don’t worry; repairing your WordPress database is not as daunting as it sounds!
Here’s a simple approach to get it done:
- Backup Your Database: Before making any changes, it’s essential to create a backup. You can use plugins like UpdraftPlus or Duplicator.
- Access wp-config.php: Locate the
wp-config.phpfile in your WordPress root directory. You can do this via FTP or through your hosting control panel. - Add Repair Code: Add this line of code:
define('WP_ALLOW_REPAIR', true);. This will allow you to run the repair process. - Run the Repair: Go to your browser and type in
http://your-site.com/wp-admin/maint/repair.php. You’ll see options to repair or repair and optimize your database. - Remove Repair Code: Once you’ve completed the repair, remove the code you added in the wp-config.php file for security purposes.
With a little care and these straightforward steps, you can get your WordPress database back to excellent working condition, making it easier to manage your posts, including moving them to the trash without hassle!
Utilizing the WP-CLI for Advanced Solutions
When tackling WordPress errors, especially those linked to moving items to trash, using the WordPress Command Line Interface (WP-CLI) can be a game changer. For those unfamiliar with it, WP-CLI is a powerful tool that lets you manage your WordPress site through a command line, which can sometimes be much faster than working through the web interface.
To get started with WP-CLI, you’ll first need to ensure you have it installed on your server. Many hosting providers include it by default, but if yours doesn’t, don’t worry! Installing WP-CLI involves just a few simple steps:
- Download the WP-CLI PHAR file: You can do this using wget or curl commands.
- Make it executable: Use the command `chmod +x wp-cli.phar`.
- Move it to a directory in your PATH: For example, you might use `sudo mv wp-cli.phar /usr/local/bin/wp`.
Once it’s set up, you can start utilizing commands to manipulate your site’s data. For example, if you’re having trouble moving multiple items to trash, you can use the command:
wp post delete --force This command allows you to delete a post permanently or move it to the trash if you omit the `–force` flag. The real beauty of WP-CLI is that you can execute these commands in bulk. If your trash function is not performing as expected, using WP-CLI’s delete function might resolve the issue efficiently and quickly.
Preventive Measures to Avoid Future Errors
Once you’ve navigated the stormy seas of WordPress errors, it’s crucial to put measures in place to avoid future issues. A proactive approach can save you a lot of trouble down the line. Let’s explore some practical strategies to keep your WordPress site running smoothly.
- Regularly Update WordPress: Keeping WordPress, themes, and plugins up to date is essential. Updates often contain vital bug fixes and security patches.
- Backup Your Site: Regular backups can save your data in cases where you need to restore a prior version. Use reliable plugins like UpdraftPlus or BackupBuddy.
- Optimize Database: Use plugins like WP-Optimize to clean up your database by removing old revisions, spam comments, and unapproved comments, which can help keep your site snappy.
- Limit Plugin Usage: Be cautious about the number of plugins you install. Each one can introduce potential conflicts or errors, affecting site performance.
- Monitoring Performance: Use tools like Query Monitor to keep an eye on potential bottlenecks and performance issues before they escalate into errors.
Implementing these preventive measures can create a safer and more seamless WordPress experience. Remember, an ounce of prevention is worth a pound of cure, particularly in the ever-evolving landscape of website management.
When to Seek Professional Support
While many WordPress errors can be resolved independently through basic troubleshooting, there are instances when seeking professional support is not only advisable but necessary. Recognizing when to call in the experts can save time, prevent further complications, and ensure your site functions optimally.
Consider the following scenarios where professional assistance may be beneficial:
- Persistent Errors: If you encounter recurring problems that do not resolve despite multiple attempts at troubleshooting, it may indicate a deeper underlying issue.
- Complex Technical Issues: Issues involving website performance, security vulnerabilities, or plugin conflicts often require specialized knowledge beyond basic troubleshooting skills.
- Data Loss: If you’ve accidentally lost crucial data or posts, a professional can help recover that data using advanced methodologies, including backups and database management.
- Time Constraints: If you have impending deadlines or lack the time to devote to problem-solving, hiring a professional can expedite the resolution process, allowing you to focus on other important aspects of your site.
- Customization Needs: When your website requires advanced customization or development that you’re unfamiliar with, seeking expert help can ensure that changes are made correctly without compromising site integrity.
A professional WordPress developer or support service typically has the experience and tools required to diagnose and fix complex errors effectively. Many online resources offer a vast array of support options tailored to different budgets and needs, ensuring that expert assistance is always accessible.
In conclusion, recognizing the signs that indicate when to seek professional support can not only save valuable time but also ensure a smooth, hassle-free experience while maintaining your WordPress site.


