Have you ever changed the PHP version of your WordPress site, only to face a barrage of errors? You’re not alone! Many users encounter issues after upgrading or downgrading PHP versions. Understanding the root cause of these errors is crucial for troubleshooting effectively. In this guide, we’ll walk you through the essentials of PHP and WordPress compatibility and help you fix those pesky errors, ensuring that your site runs smoothly again.
Understanding PHP and WordPress Compatibility
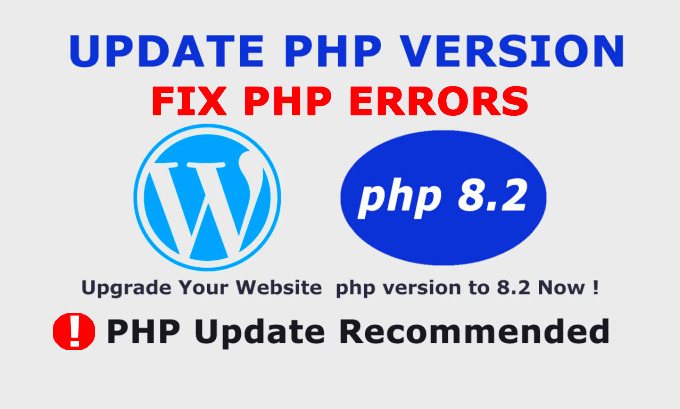
PHP, or Hypertext Preprocessor, is a server-side scripting language that’s essential for building dynamic web pages. WordPress, being a content management system, relies heavily on PHP to function optimally. However, not every PHP version is compatible with every WordPress version, leading to potential issues. Here are some key points to consider:
1. PHP Version Requirements:
- Each version of WordPress specifies a minimum required PHP version.
- As of October 2023, WordPress recommends using PHP version 7.4 or greater for optimal performance.
- Older PHP versions may lack support for newer WordPress features.
2. Compatibility Issues:
- Using a PHP version that’s too old may lead to deprecated functions, which can cause errors.
- Conversely, using a PHP version that’s too new might not be compatible with older themes or plugins.
3. Testing Compatibility:
| PHP Version | WordPress Compatibility |
|---|---|
| 5.6 | Deprecated; Use for legacy sites only |
| 7.2 | Supported, but not recommended |
| 7.4 | Recommended for most users |
| 8.0+ | Compatible with latest WordPress versions; check plugins |
In summary, ensuring that your site’s PHP version aligns with WordPress requirements is essential to avoid errors and maintain smooth functionality. Proper testing and understanding of compatibility is the first step toward a hassle-free WordPress experience.
Common WordPress Errors Encountered After PHP Version Change
Changing the PHP version of your WordPress website can be a double-edged sword. While upgrading to the latest PHP version can enhance your site’s performance and security, it can also lead to a slew of errors that may boggle your mind. Let’s dive into some of the most common errors that website owners encounter after making this change.
- White Screen of Death: This infamous error typically leaves you with a blank page. It often occurs due to incompatibility with themes or plugins that aren’t updated to work with the new PHP version.
- Fatal Error: Allowed Memory Size Exhausted: This error means your website is consuming more memory than the PHP configuration permits. Switching PHP versions can impact memory limits, exacerbating this issue.
- Syntax Error: You may notice this error message if your theme or plugin codes have incompatible syntax with the new PHP. Such errors can bring your site crashing down.
- Type Error: This occurs when a function receives an unexpected data type. It’s a common problem when outdated code doesn’t align with the new PHP version’s requirements.
- Database Connection Errors: Sometimes, changing PHP versions can disrupt the connection to your database, leading to error messages that can frustrate even the most patient users.
Identifying these errors as soon as they occur is crucial. Ignoring them not only disrupts your site’s functionality but can also harm your site’s SEO and user experience. But worry not! Most of these issues can be fixed with a bit of troubleshooting.
Step-by-Step Guide to Fix WordPress Errors
Now that you’ve identified some common issues post-PHP version change, let’s walk through a practical guide to troubleshoot and resolve these errors. It sounds daunting, but with the right steps, you’ll have your site up and running smoothly in no time!
- Backup Your Website: This step is non-negotiable. Before making any changes, ensure you have a complete backup of your site. You can use plugins like UpdraftPlus or BackupBuddy for this task.
- Switch Back to Previous PHP Version: If your website is facing severe errors, consider reverting to the old PHP version via your hosting control panel. This will give you immediate relief while you troubleshoot.
- Update All Themes and Plugins: An easy fix often overlooked is ensuring that all your themes and plugins are up to date. Most developers release updates that make their products compatible with the latest PHP versions.
- Check Error Logs: Enable debugging in WordPress by adding `define(‘WP_DEBUG’, true);` to your wp-config.php file. This will provide you with detailed error messages to point you in the right direction.
- Review Custom Code: If you have custom code snippets in your theme or plugins, check for syntax errors or outdated functions. You may need to seek help from a developer if you’re unsure how to proceed.
- Increase PHP Memory Limit: If you’re encountering memory exhaustion errors, consider increasing your PHP memory limit. You can do this by adding `define(‘WP_MEMORY_LIMIT’, ‘256M’);` to your wp-config.php file.
- Consult Your Hosting Provider: If all else fails, reach out to your hosting provider’s support team. They can offer insights specific to your hosting environment and may provide solutions you haven’t thought of.
By following these steps, you’re on the way to rectifying those pesky errors and making your WordPress site stable and efficient again. Remember, persistence is key!
5. Checking and Updating Themes and Plugins
After changing the PHP version of your WordPress site, it’s crucial to check and update your themes and plugins. The reason? Older themes and plugins might not be compatible with the latest PHP version, leading to errors and functionality issues on your site.
Here’s a simple checklist to follow:
- Review Compatibility: Check the compatibility of your themes and plugins with the new PHP version. Most developers will indicate compatibility on their website or in the WordPress plugin repository.
- Update Everything: Ensure all your themes and plugins are updated to their latest versions. Developers often release updates to maintain compatibility with the latest PHP versions.
- Deactivate Non-Essential Plugins: Temporarily deactivate plugins that are not critical to your site’s operation. This step can help identify any plugin conflicts that might have arisen from the PHP change.
- Switch Themes (if Necessary): If your theme is outdated and not compatible with the new PHP version, consider switching to a more modern, actively maintained theme.
After making updates, it’s essential to test your site thoroughly. Navigate through your pages, ensuring everything functions as expected. If you encounter issues, document any error messages you see. This information can be helpful if you decide to reach out for support.
6. Debugging WordPress Errors
Debugging WordPress errors can seem daunting, especially after updating your PHP version. However, taking it step-by-step can simplify the process and help you pinpoint the issue quickly.
First, enable debugging in your WordPress configuration. Here’s how:
- Open the
wp-config.phpfile in your WordPress root directory. - Look for the line
define('WP_DEBUG', false);and change it todefine('WP_DEBUG', true); - You can also add lines to log errors to a file. Add
define('WP_DEBUG_LOG', true);for logging errors towp-content/debug.log. - Save the changes.
This process allows you to see error messages directly on your site or in the debug log. Common errors to look out for include:
- Fatal Errors: These usually indicate that a piece of code is not functioning correctly.
- Deprecated Warnings: These mean that certain functions in your theme or plugins are outdated.
- Database Connection Errors: These occur when WordPress cannot connect to your database.
Once you identify the errors, you can take further action. This may involve updating plugins, switching themes, or even contacting support. Remember, the debugging process is essential for maintaining a healthy WordPress site after any changes.
Reverting to a Previous PHP Version
If you’re encountering issues after upgrading your PHP version, don’t panic! Sometimes, the simplest solution is reverting to a previous version that worked smoothly for your WordPress site. Here’s how you can roll back your PHP version effectively:
- Access Your Hosting Control Panel: Most hosting providers have a control panel like cPanel or Plesk. Log in and navigate to the section where you can manage your site’s PHP settings.
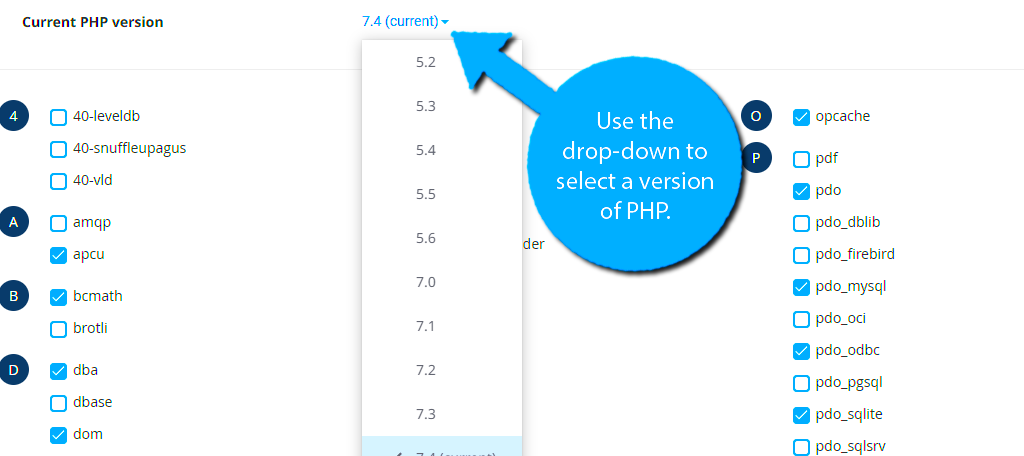
- Select PHP Configuration or Version: Look for options like “PHP Selector” or “PHP Versions.” This is where you can view and change the PHP version for your site.
- Choose the Previous Version: In the dropdown menu, select the version you want to revert to. It’s a good idea to choose a version that you know worked well for your WordPress site previously.
- Apply Changes: After selecting your desired PHP version, make sure to save or apply the changes.
- Check Your Site: Visit your WordPress site to verify if everything is functioning correctly. Test essential features and plugins to confirm.
- Monitor for Errors: Keep an eye out for any recurring issues or error messages to ensure reverting was indeed the correct decision.
Sometimes, returning to a previous version is not just about fixing immediate problems, but it’s also a temporary measure while you troubleshoot compatibility issues with your themes and plugins. Remember, the goal is to provide a seamless experience for your visitors!
Best Practices for Managing PHP Versions in WordPress
Managing PHP versions in WordPress may seem intimidating, but with some best practices, you can ensure that everything runs smoothly. Here are some tips to help you navigate this process:
| Practice | Description |
|---|---|
| Regular Backups | Before making any changes, always back up your site. Use plugins like UpdraftPlus or tools from your hosting provider to keep your data safe. |
| Test Environment | If possible, set up a staging environment. This way, you can test new PHP versions without affecting your live site. |
| Stay Updated | Keep all themes and plugins updated. Compatibility issues often arise from outdated components. |
| Review Compatibility | Check PHP compatibility for themes and plugins before upgrading. Many developers list compatible PHP versions on their sites. |
| Monitor Performance | After any changes, monitor your site’s performance and check for errors. Tools like Google PageSpeed Insights can be helpful. |
By adhering to these best practices, you not only safeguard your WordPress site from glitches but also enhance its overall performance. Remember, taking a cautious approach is always better than risking your site’s functionality!
Conclusion
Fixing WordPress site errors after changing PHP versions can seem daunting, but a systematic approach can help you quickly identify and resolve issues. Remember that keeping your website’s PHP version up to date is crucial for maintaining security and performance.
Here are some key steps to consider:
- Backup Your Site: Always start with a full backup of your website, including your database and files.
- Check Compatibility: Review your plugins and themes for compatibility with the new PHP version. This can often be done on the developer’s website or the WordPress plugin repository.
- Debugging Mode: Enable debugging in your wp-config.php file by adding
define('WP_DEBUG', true);. This will help you identify any errors or warnings that occur. - Restore Previous Version: If your website breaks, consider reverting to the previous PHP version until compatibility issues are resolved.
- Update Plugins/Themes: Ensure all your plugins and themes are updated to their latest versions to guarantee they work with the new PHP version.
Additionally, consider consulting the official WordPress documentation or your hosting provider for guidance specific to your situation. Following a methodical approach and being proactive can save you time and ensure your WordPress site runs smoothly on the latest PHP version.

