Changing fonts in WordPress can seem daunting if you’re new to web design, but it’s a key element of personalizing your website. A well-chosen font can elevate your site’s aesthetics and enhance readability, ensuring that your content resonates with your audience. Whether you’re running a blog, an e-commerce site, or a portfolio, mastering font customization will help you create a distinctive online presence. In this guide, we’ll break down the steps to change fonts in WordPress and explain why typography matters.
Understanding the Importance of Typography
Typography isn’t just about picking pretty letters; it influences how your audience perceives your brand and content. Here’s why it matters:
- Readability: The font you choose affects how easily your visitors can consume your content. For instance, sans-serif fonts are often easier to read on screens.
- Brand Identity: Your font choices can reflect your brand’s personality. A modern sans-serif font might convey a tech-savvy image, while a classic serif font could suggest tradition and reliability.
- User Experience: Good typography improves the user experience by making your text more scannable. Attention to font size, line spacing, and alignment can keep readers engaged.
- Emphasis and Hierarchy: Different font styles can be used to create a visual hierarchy, helping readers navigate your content easily. Using bold for headings and lighter fonts for body text can guide your audience’s focus.
Here’s a quick table summarizing key aspects of typography:
| Aspect | Impact |
|---|---|
| Readability | Ensures effortless reading experience |
| Brand Identity | Reflects the essence of your brand |
| User Experience | Keeps visitors engaged and informed |
| Emphasis and Hierarchy | Guides focus and improves navigation |
In summary, typography plays a crucial role in website design. By choosing the right fonts, you enhance both the aesthetics and functionality of your WordPress site. Now, let’s dive into how you can change those fonts effectively!
3. Methods to Change Fonts in WordPress
Changing fonts in WordPress may seem daunting at first, but thankfully, you have a variety of methods at your disposal. Whether you want a simple tweak or a complete overhaul of your site’s typography, the options are both user-friendly and effective. Here are three popular methods you’ll want to explore:
- Using Themes: Most WordPress themes come with built-in font options. This is often the easiest method. Just navigate to the theme settings, look for typography or font settings, and make your adjustments right there.
- Plugins: If your theme doesn’t offer the flexibility you need, consider installing a font plugin. Plugins like Easy Google Fonts or WP Google Fonts let you manage and change fonts easily. They often come with a user-friendly interface that lets you select fonts and customize them without any coding knowledge.
- Custom CSS: For those who are comfortable with a bit of coding, you can always use custom CSS to change fonts. You can add your CSS in the customizer or through a child theme. This allows for complete control over the typography and styling on your site.
Each method has its pros and cons, so choose what best fits your technical comfort level and design needs. Happy font hunting!
4. Using the WordPress Customizer
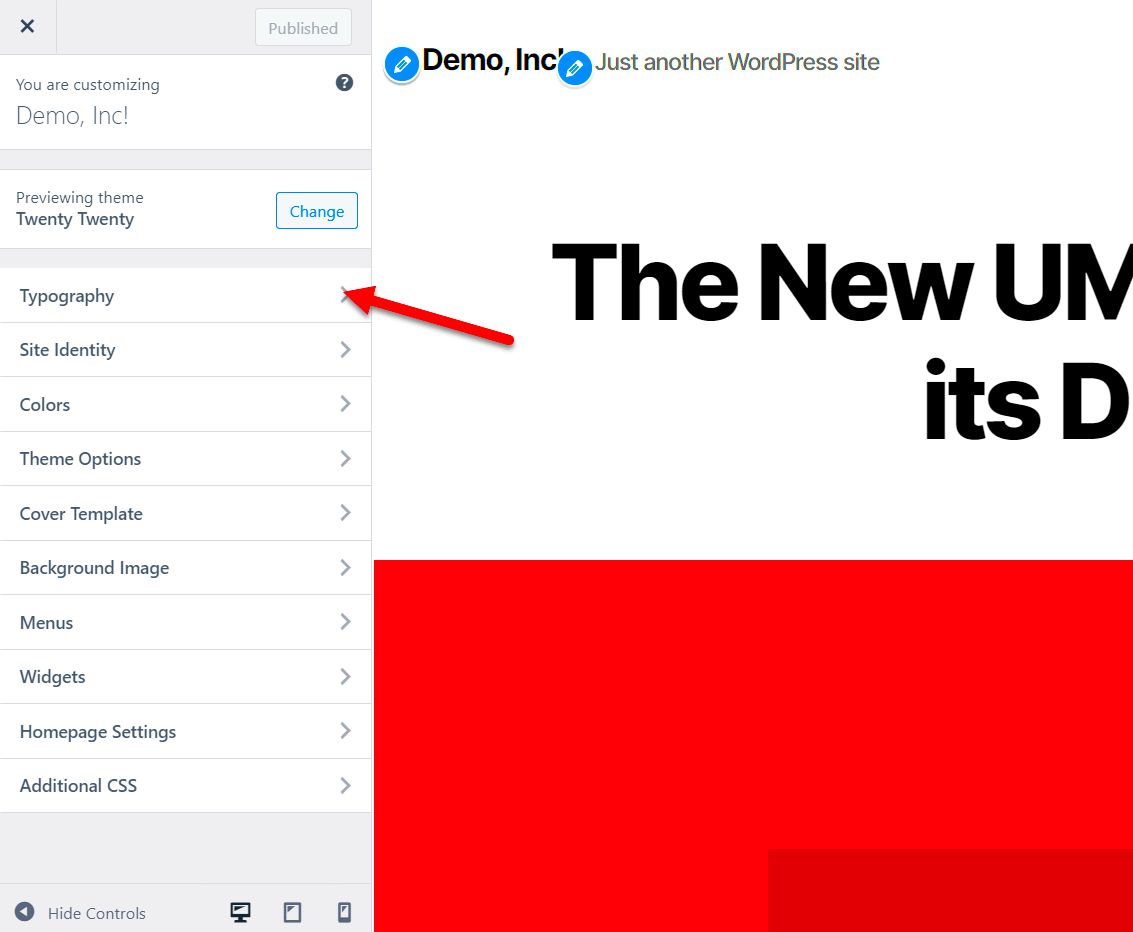
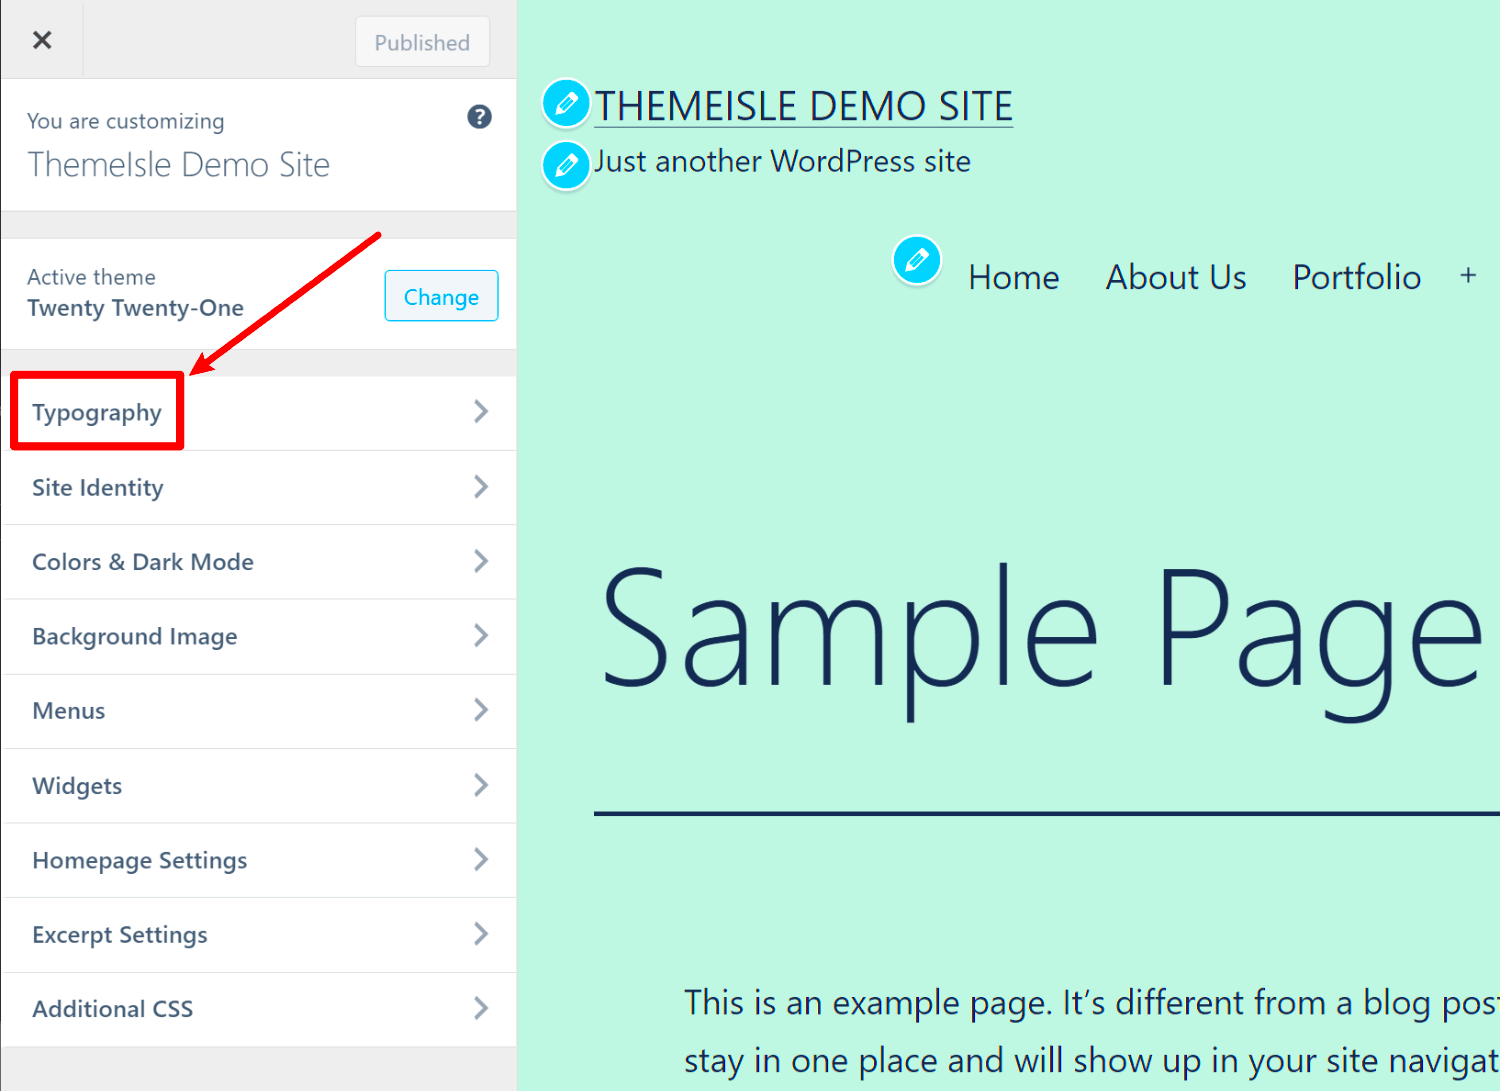
The WordPress Customizer is a fantastic tool that offers an intuitive way to change fonts along with other visual elements on your site. With just a few clicks, you can preview your changes in real-time before making them public. Here’s how to use the Customizer for font changes:
- Access the Customizer: From your WordPress dashboard, navigate to Appearance > Customize. This will open the Customizer interface.
- Navigate to Typography: Look for sections labeled as Typography, Fonts, or even General Settings. The exact name can vary based on your theme.
- Select Your Font: Within the typography settings, you’ll often see dropdown menus for various text elements like headings, paragraphs, and menus. Click through these options to explore available fonts.
- Preview Your Changes: As you select different fonts, you can see the changes live in the preview area. This allows you to experiment without committing right away.
- Save Your Settings: Once you’re happy with the fonts you’ve chosen, don’t forget to click Publish to save your changes!
Using the Customizer is not just easy; it’s also a great way to fine-tune your site’s look. So, jump in and give it a try!
Changing Fonts with Page Builders
If you’re using a page builder to construct your WordPress pages, you’re in for a treat! Page builders like Elementor, Beaver Builder, and WPBakery make it super easy to change fonts without any coding skills. They come with intuitive drag-and-drop interfaces that allow you to customize the look and feel of your site effortlessly.
To change fonts using a page builder, follow these simple steps:
- Open your page builder: Navigate to the page you want to edit and activate the page builder tool.
- Select the text element: Click on the text block or widget that contains the text you want to modify.
- Access the font settings: Once you select the text element, a style panel will usually appear on the left side. Look for font settings or typography options.
- Choose your font: From the font dropdown, select a new font. Many page builders also let you pick font size, weight, line height, and letter spacing. Experiment with these settings to find the perfect combination!
- Preview and publish: Always preview your changes to ensure everything looks great, and then hit the publish button to make your changes live.
Moreover, many page builders offer integrations with Google Fonts and Adobe Fonts, giving you a vast array of font choices. The best part? You can make these changes at a specific section on your page or globally where settings can apply across your entire site. This flexibility allows your branding to shine through every post!
Installing and Using Font-Related Plugins
If you’re looking for more advanced options in font customization, WordPress offers a variety of font-related plugins that can take your typography game up a notch. These plugins are designed to integrate seamlessly with your site, allowing you to access a broader range of fonts and customize them in a way that suits you best.
Here’s a straightforward guide to installing and using these plugins:
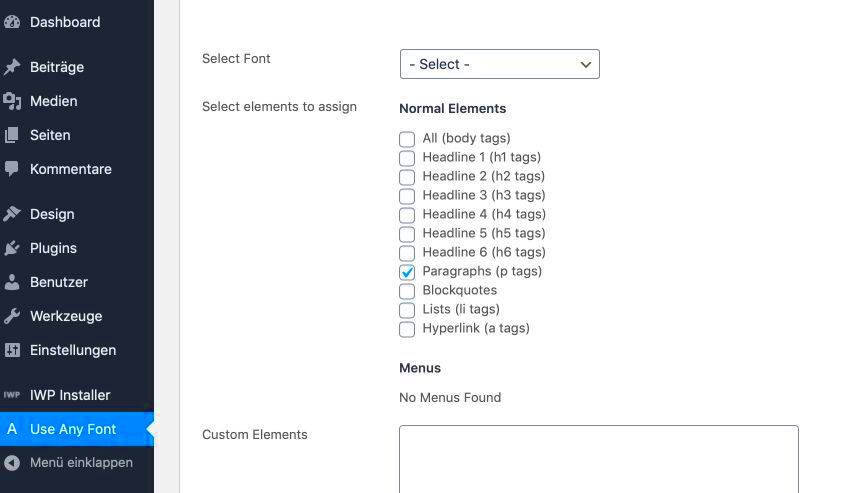
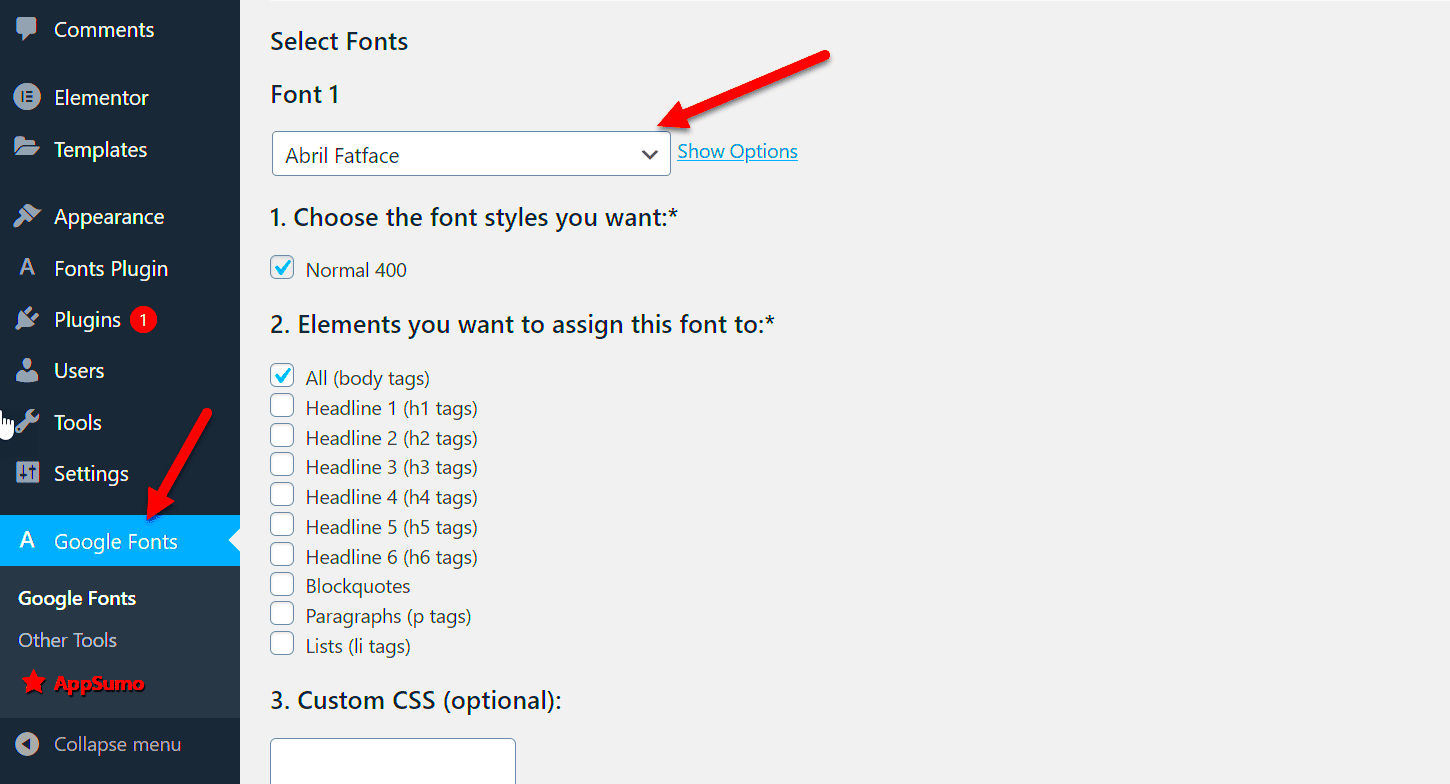
- Install a font plugin: Navigate to your WordPress dashboard, go to Plugins > Add New, and search for font plugins like Easy Google Fonts, Custom Fonts, or WP Google Fonts. Click Install Now and then activate the plugin.
- Configure the plugin settings: After activation, you’ll usually find a new menu item in the dashboard dedicated to the font plugin. Here, you can start exploring the different fonts available.
- Choose your fonts: Each plugin will have various customization options. Select your fonts and customize settings such as font size, color, and style. Most allow you to preview changes live before applying them.
- Assign fonts to specific elements: Many font plugins let you assign specific fonts to different elements, such as headings, paragraphs, or buttons. Use this feature to achieve a cohesive look across your website.
- Save your settings: Once you are happy with the selections, make sure to save your changes. It might also be a good idea to clear your cache if you’re using a caching plugin, just to see the changes right away.
With the help of font-related plugins, you can also get access to additional features like font pairs, font weight adjustments, and custom Google Font uploads. These capabilities allow for a unique and personalized typography that represents your brand perfectly. So, if you’re eager to give your site a unique style, font plugins are definitely a great way to enhance your WordPress experience!
7. Adding Custom Fonts Manually
When the default fonts in WordPress just don’t cut it, manually adding custom fonts can open up a world of design possibilities for your site. Whether you’re aiming for a unique look or trying to align your font style with your brand identity, this process can be straightforward with a little guidance.
Here’s a simple step-by-step method to add custom fonts manually:
- Choose Your Font: First, find a font you love! Google Fonts is a great place to start. Browse their extensive library and select the font(s) you want to use.
- Download the Font Files: Once you’ve chosen a font, download the necessary files. Generally, you’ll need the .woff, .woff2, and .ttf formats for best compatibility.
- Upload the Font Files: Use an FTP client or your hosting provider’s file manager to upload your font files to your WordPress theme’s directory, preferably within a dedicated folder like `fonts`.
- Add CSS to Enqueue the Font: You’ll need to add some CSS to your theme. Go to your theme’s `style.css` file (or use the Additional CSS section in the Customizer) and include the `@font-face` rule to define your custom font.
- Apply the Font: Now it’s time to apply the font throughout your site. Use CSS classes or IDs to specify where and how you want your custom font to be used (e.g., headings, body text).
Don’t forget to check for cross-browser compatibility and test your website to ensure everything appears as it should. Happy custom styling!
8. Testing and Previewing Your Font Changes
Once you’ve added your new custom fonts, the next crucial step is testing and previewing those changes to make sure everything looks just right. This process can save you from committing to a design that doesn’t work visually or functionally with your site’s overall layout.
Here are some steps to effectively test and preview your font changes:
- Use the WordPress Customizer: This is one of the easiest ways to preview changes. Head to Appearance > Customize and navigate to the relevant sections to see how your custom fonts integrate.
- Check Responsiveness: Test how your fonts look on different devices—desktop, tablet, and mobile. You can do this directly in the Customizer by clicking the device icons at the bottom.
- View in Multiple Browsers: Open your site in various browsers (Chrome, Firefox, Safari, etc.) to ensure the fonts render correctly across the board. Sometimes a font may look good in one browser but not in another.
- Use Browser Developer Tools: Right-click on your site and select “Inspect” or “Inspect Element.” This allows you to play around with CSS in real-time and see how changes affect your font styles.
- Gather Feedback: If possible, get some fresh eyes on your site. Ask friends or colleagues for their opinions on your new fonts—sometimes another perspective can help highlight issues you might miss.
By taking the time to test and preview your font changes, you not only ensure a polished final product but also create a more enjoyable experience for your website visitors.
Common Issues and Solutions
Changing fonts in WordPress is usually a smooth process, but like anything else, it can sometimes come with its own set of hiccups. Let’s delve into some common issues you might encounter when customizing your fonts and how to solve them.
- Font Not Applying: If you’ve followed the steps to change the font but don’t see any changes, double-check if you properly saved your settings. Sometimes, it’s as simple as refreshing the page or clearing your browser’s cache.
- Font Looks Different on Mobile: Responsiveness is key! Fonts can appear differently on mobile devices. Make sure you preview your site in various screen sizes before finalizing changes. Using a responsive font plugin can help maintain consistency across devices.
- Incompatibility with Theme: Some WordPress themes may not support certain fonts. If you’re encountering this issue, check the theme documentation or support forums. Switching to a different font that your theme supports might be necessary.
- Loading Speed Issues: Adding too many custom fonts can slow down your website. To mitigate this, limit the number of fonts you use, and make sure to choose fonts that are optimized for web use. You might also want to consider using a font loader to improve loading times.
- Visual Inconsistency: It’s common for fonts to look different across various browsers. Always test your changes in multiple browsers like Chrome, Firefox, and Safari to ensure consistency. You can use browser tools to tweak and refine the font sizes and styles as needed.
Conclusion and Final Thoughts
In the world of WordPress, the way you present your content plays a vital role in your site’s overall appeal and user engagement. Changing fonts is a relatively simple task, but it can make a significant impact on how visitors perceive your website.
Remember, while customizing fonts, it’s not just about aesthetics. Here are a few final thoughts to keep in mind:
- Consistency is key: Stick with a particular set of fonts across your website. This helps in maintaining a cohesive design, improving readability, and enhancing user experience.
- Accessibility matters: Always choose fonts that are legible. Consider your audience—make sure that all visitors, including those with visual impairments, can read your content without strain.
- Your brand voice: Fonts should reflect your brand’s personality. Whether you want to come off as professional, casual, or playful, your font choice should align with your branding strategy.
Lastly, don’t hesitate to experiment! WordPress plugins make it easier than ever to try out different fonts without permanent changes. So go ahead, give your site a fresh look, and make it your own!

