Editing headers in WordPress is a simple yet crucial task that can significantly impact your website’s appearance and functionality. Whether you want to enhance your site’s aesthetics or make it more user-friendly, knowing how to effectively edit headers can make all the difference. From incorporating logos to adjusting menus, headers are often the first thing visitors see when they land on your pages, setting the tone for their experience. In this guide, we’ll walk you through the essentials of editing headers, ensuring you can achieve the look you want with ease.
Understanding WordPress Header Structure

Before diving into editing headers, it’s important to have a grasp of the basic structure of headers in WordPress. The header typically includes several key elements:
- Site Title: This is the name of your website, and it often appears prominently in the header.
- Logo: Many websites choose to place a logo in the header for branding purposes.
- Navigation Menu: This is where visitors can find links to the main sections of your website.
- Header Image: A unique image can be used to add personality and visual flair to your header.
- Search Bar: Some headers include a search feature for easy accessibility.
Each of these components plays a crucial role in how users interact with your site. Additionally, there are several ways to customize these elements:
| Element | Customization Options |
|---|---|
| Site Title | Edit via Site Identity under Appearance > Customize |
| Logo | Upload a custom image via Site Identity |
| Navigation Menu | Manage menus in Appearance > Menus |
| Header Image | Select or upload an image in Appearance > Header |
| Search Bar | Enable via theme settings or plugins |
Understanding how these components fit into the WordPress header structure allows you to make informed decisions when customizing your website. Ready to make your header stand out? Let’s get started!
3. Accessing the WordPress Customizer
Accessing the WordPress Customizer is a pretty straightforward process that can transform your site’s header with just a few clicks. Let’s dive into how you can get there!
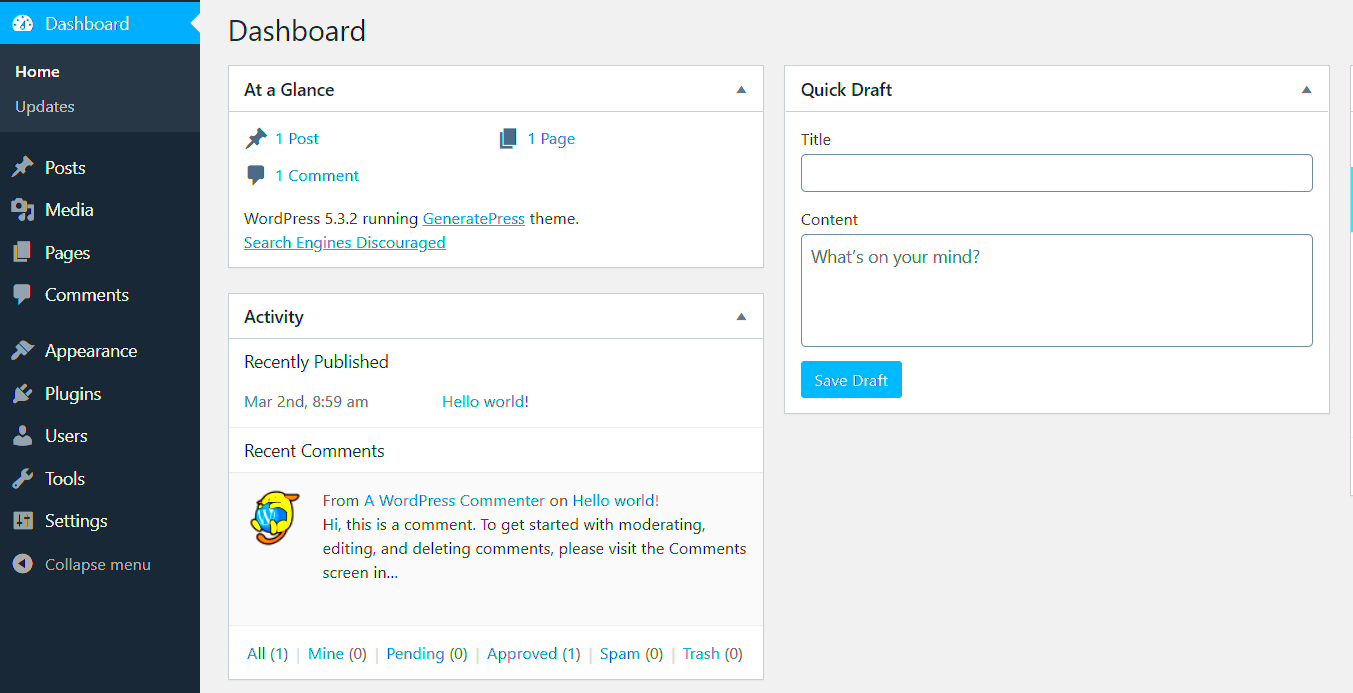
First, you’ll want to log in to your WordPress admin dashboard. This is like the command center of your website, and it’s where all the magic happens. Once you’re logged in, follow these simple steps:
- On the left sidebar, look for the “Appearance” option.
- Click on “Customize.” This will take you directly into the WordPress Customizer.
Now that you’re inside the Customizer, you’ll see a live preview of your site on the right side and various options on the left. Here, you can tweak everything from colors, fonts, and layouts to the all-important header settings.
To find specific header options, you might need to expand sections like “Site Identity” or “Header Image.” Each theme is a little different, but they typically offer various customizable features for the header.
Once you’ve made any changes you desire, remember to hit the “Publish” button at the top to save your updates. And guess what? You can always go back and tweak things further whenever inspiration strikes!
So, if you’re looking to personalize your header and give it that unique touch, the Customizer is your best friend. It’s user-friendly, intuitive, and the live preview feature lets you see changes in real-time, making it a fun process!
4. Editing the Header Using the Block Editor
Editing your header directly from the Block Editor can be a game-changer. It gives you a lot of flexibility and control over how your header looks and feels right from within the post or page you are currently editing. Let’s break down how to do it!
To get started, you need to access the Block Editor. Open the page or post where you’d like to edit the header. If you’re using a WordPress theme that supports custom headers with blocks, this is where the fun begins!
Here’s how to edit your header using the Block Editor:
- Once inside the Block Editor, scroll to the top of your page. If your theme allows, you’ll find the header block. If not, you might need to add it manually.
- Click on the “+” icon to add a new block, then search for “Header.” Select the header block you prefer.
- Now you can customize your header! You can add an image, change the text, adjust the colors, and even implement different styles.
- Don’t forget to preview your changes as you make them. You can do this by clicking on the “Preview” button on top.
Once you’re satisfied with how your header looks, click on the “Update” or “Publish” button to save your changes. It’s that easy!
A few tips to enhance your header editing:
- Consider Mobile Views: Always check how your header appears on mobile devices.
- Use High-Quality Images: If you are adding an image to your header, ensure it’s high resolution for the best visual impact.
- Experiment: Don’t hesitate to try creative layouts with different blocks to see what resonates best with your audience.
And there you have it! Editing your header with the Block Editor is not just about changing text or images; it’s about crafting a visual experience that captivates your visitors right from the get-go!
Using a Page Builder for Advanced Header Customization
If you’re looking to take your header design to the next level in WordPress, a page builder plugin can be your best friend. Page builders like Elementor, Beaver Builder, or WPBakery offer intuitive drag-and-drop interfaces that allow users to create custom headers without dealing with code. Here’s a quick rundown on how to leverage these tools:
- Install and Activate the Page Builder: Head over to your WordPress dashboard, navigate to Plugins, and either find your chosen page builder or upload it if it’s not in the directory. Don’t forget to activate it!
- Create or Edit a Header Template: With most page builders, you can either create a new template or edit an existing one. Look for an option specifically for Header templates, often found in template settings.
- Add Widgets and Elements: Use the drag-and-drop functionality to add elements like logos, navigation menus, or social media icons. You can customize the arrangements, sizes, and design directly in the interface.
- Styling Options: Most page builders offer extensive styling options. Adjust colors, fonts, and spacing to match your brand’s look and feel effortlessly.
- Responsive Design: Ensure your header looks great on all devices. Most page builders allow you to preview and adjust settings for mobile and tablet views.
Once you’re satisfied with your header design, simply save your changes and preview your site. This approach not only enhances your header visually but can also improve user experience.
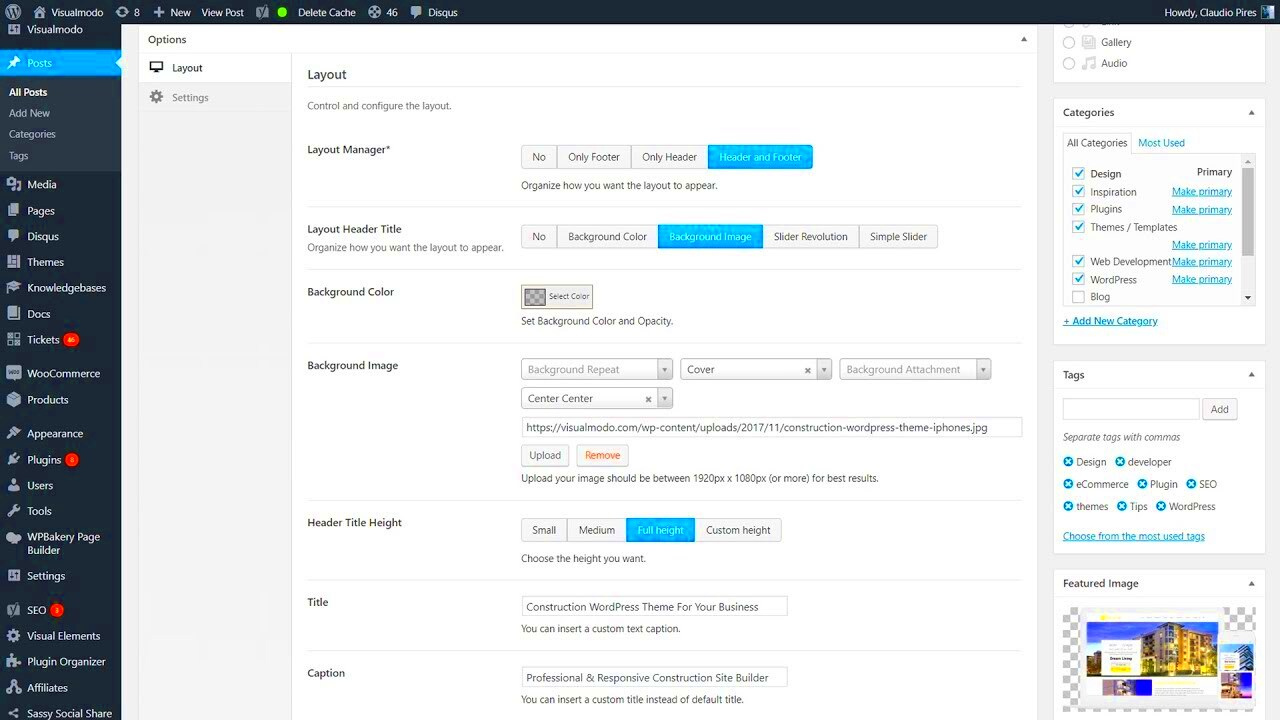
Modifying the Header in Theme Settings
Another way to edit your WordPress header is through the theme settings. Many premium themes come with robust customization options built right into the Theme Customizer or Theme Options panel. This can make the process a breeze, especially if you prefer not to use a page builder. Let’s go through the steps:
- Access the Theme Customizer: From your WordPress dashboard, go to Appearance and click on Customize. This opens the visual editor, allowing you to see changes in real time.
- Locate Header Settings: Within the customizer, look for options labeled ‘Header,’ ‘Header Settings,’ or something similar. This is where you can make various modifications to your header.
- Change Site Title and Tagline: Modify the text displayed in the header. Many themes allow you to adjust the font size, color, and positioning as well.
- Add or Edit Menu: You can select which menus appear in your header and customize their layout. This is critical for navigation and user accessibility.
- Logo and Favicon: Most themes allow you to upload a custom logo and favicon. Make sure to choose images that represent your brand well.
Once you’ve made all your changes, don’t forget to click ‘Publish’ to save your modifications. Modifying the header through theme settings is often a more straightforward approach, especially for those new to website design.
7. Adding Custom HTML and CSS to the Header
When you’re delving into WordPress, one of the most exciting features is the ability to customize your header through custom HTML and CSS. This can really help you establish a unique visual identity for your website or blog. But where do you begin?
First off, let’s understand what you can include in your custom header. Whether you’re looking to add a logo, a navigation bar, or social media icons, the header is the perfect place to start. By incorporating HTML, you can structure these elements, while CSS allows you to style them to fit your aesthetic.
Here’s a straightforward approach to adding custom HTML and CSS to your header:
- Access the Theme Customizer: Go to your WordPress dashboard, locate ‘Appearance,’ and then click on ‘Customize.’
- Add Custom HTML: Many themes allow you to insert custom HTML right in the header section. Navigate to ‘Header’ and look for the ‘Custom HTML’ box. Here, you can place your HTML code.
- Include Custom CSS: In the same ‘Customizer’ area, you’ll find an option labeled ‘Additional CSS.’ This is where you can input your CSS styles to enhance the look of your customized header.
For example, if you want to change the font of your header text, you can use a simple CSS rule like:
header h1 { font-family: 'Arial, sans-serif'; color: #333333;}
Once you’re done making changes, ensure you test them out to see if they appear as you’d like. This hands-on approach to editing your header can truly elevate your site’s overall design!
8. Previewing and Saving Your Changes
Alright, so you’ve put in the effort to customize your header, and now it’s time to see how your hard work pays off! Previewing and saving your changes in WordPress is a crucial step to ensure everything looks just right before going live.
After adding your custom HTML and CSS, don’t worry—WordPress makes it super simple to see what you’ve created. Here’s how:
- Use the Preview Option: In the ‘Customizer,’ after making your edits, you’ll notice a ‘Preview’ button. Click on it, and you’ll see how your site looks with the updated header in real-time.
- Check Responsiveness: As you preview, make sure to resize your browser. It’s important that your header looks good on all devices—desktop, tablet, and mobile.
- Make Adjustments if Needed: If something doesn’t look right, feel free to go back and edit your HTML or CSS. The beauty of WordPress is that you can iterate as much as you want until it’s perfect!
- Save Your Changes: Once you’re completely satisfied with how everything looks, hit the ‘Publish’ button to save your changes. Your customized header is now live for all to see!
Remember, saving your changes is just as important as previewing them. Without hitting that publish button, your hard work doesn’t get displayed to your visitors. So take a moment to enjoy your new header—it’s a reflection of your website’s personality!
Common Header Editing Issues and Troubleshooting
Editing the header in WordPress is often straightforward, but sometimes users run into a few common issues. The good news is that many of these problems can be easily resolved. Here’s a look at some prevalent header editing issues and steps you can take to troubleshoot them:
- Header Not Updating: One of the most frustrating issues is when changes to your header don’t seem to save or update. If this happens, try clearing your browser cache or refreshing the page. Also, check if a caching plugin is holding onto old data.
- Responsive Design Problems: If your header looks great on desktop but not on mobile, you may have an issue with responsive settings. Use the WordPress Customizer to preview how your header responds to different screen sizes and make adjustments to avoid overlapping text or images.
- Customizer Not Working: Sometimes, the WordPress Customizer doesn’t load properly, which can hinder header editing. This might be due to a plugin conflict or an outdated theme. Try deactivating plugins one by one and see if that resolves the issue.
- Logo Not Displaying: If you’ve uploaded a logo but it’s not showing, double-check the image size and format. Ensure your theme supports the logo feature, as some themes may require specific settings.
If you’re facing any issues not covered above, the WordPress support forums can be a great place to seek help. Be sure to share details about your theme and the steps you’ve already tried.
Conclusion and Best Practices for Header Design
In conclusion, editing the header in WordPress is an important aspect of customizing your website and making a lasting first impression on visitors. A well-designed header can enhance user experience and help in brand recognition.
To ensure your header design is top-notch, consider these best practices:
- Simplicity is Key: A cluttered header can confuse visitors. Aim for a clean and straightforward layout that highlights essential elements like your logo, menu, and contact information.
- Consistency with Branding: Your header is an extension of your brand. Make sure colors, fonts, and styles align with your overall branding for a cohesive look.
- Optimize for Mobile: As mobile traffic continues to rise, ensure that your header is responsive and looks good on all devices. Test different screen sizes to guarantee usability.
- Include Clear Navigation: Your menu should be easy to navigate. Limit the number of items in the header menu to avoid overwhelming users, and provide clear labels.
By keeping these best practices in mind, you can create a header that not only looks great but enhances your site’s functionality as well. Happy editing!


