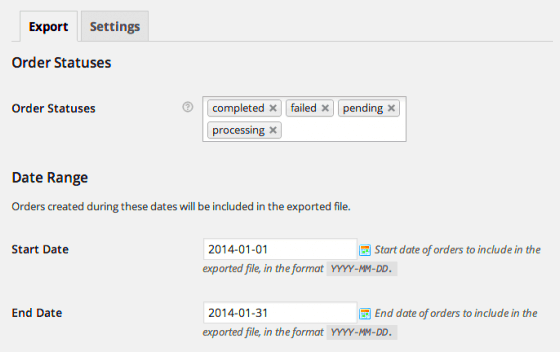
If you’re venturing into the world of WordPress and encounter the term “XML files,” you might feel a bit puzzled. Don’t worry; you’re not alone! XML, or Extensible Markup Language, is a crucial format used for data storage and transfer. In the context of WordPress, XML files play a pivotal role, especially when it comes to importing or exporting content like posts, pages, comments, and even plugin settings. So, whether you’re migrating a site or just looking to back up your content, understanding XML files is key to managing your
Understanding the Purpose of XML Files
XML files serve multiple significant purposes in the realm of WordPress. Let’s break down what makes XML files so essential:
- Data Exchange: XML provides a standardized format, allowing data to be shared between different platforms and applications seamlessly.
- Backup and Export: You can export your entire website’s content into an XML file, making it easy to back up your data or move it to another site.
- Importing Content: If you’re moving to a new host or making a new site, you can import the XML file into WordPress to recover your posts, pages, and settings.
- Plugin Compatibility: Many plugins use XML files to store settings or configurations, which can be shared and transferred between sites.
The ability to import and export information using XML can save you a lot of time and stress. Imagine losing all your valuable content and not having a way to get it back! That’s why becoming familiar with how to handle XML files in WordPress is so beneficial.
Preparing Your XML File for WordPress
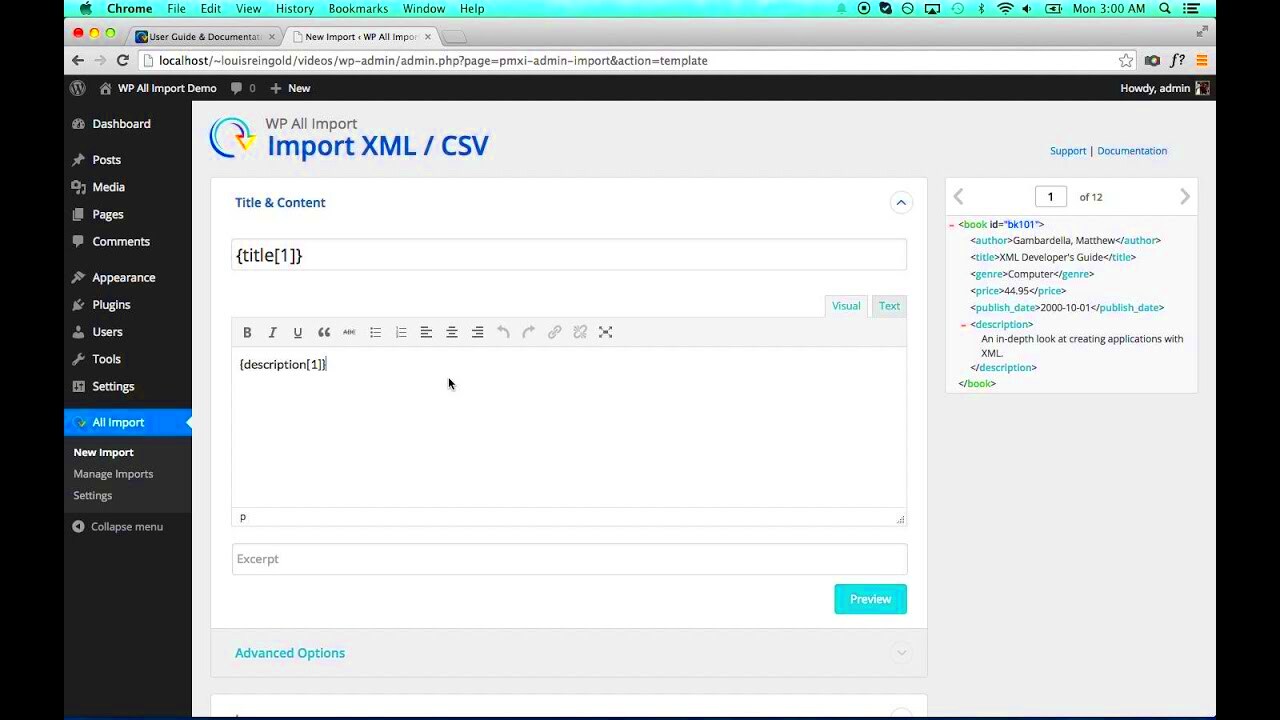
Before you start the process of uploading your .xml file to WordPress, it’s crucial to ensure that the file is properly prepared. This step sets the foundation for a smooth import process. Here’s what you need to consider:
- Understanding the XML Structure: First, know what an XML file is. In the context of WordPress, it typically contains data such as posts, pages, comments, custom fields, categories, and tags. If you’re exporting from another WordPress site, your XML should already be in the right format.
- Check the Content: Make sure that your XML file has the content you wish to import. Open the file using a text editor or an XML viewer to verify that all the necessary elements are included. Look out for missing posts or categories. If you notice anything amiss, you may need to re-export the file.
- File Size Matters: WordPress has upload limits on file sizes, which vary depending on the hosting provider. If your XML file is too large, you might face upload issues. In such cases, consider splitting the file or compressing the content. Use tools designed for this purpose, if needed.
- Backup Your Site: Always back up your existing WordPress site before importing new data. This will ensure that you can revert to the original state should anything go wrong.
- Validate Your XML: It’s a good idea to validate your XML file to ensure it adheres to XML standards. There are various online tools available for this purpose. Invalid XML can cause your import to fail.
With your XML file checked and validated, you’re all set to move on to the next step: accessing your WordPress admin dashboard.
Accessing the WordPress Admin Dashboard
The WordPress Admin Dashboard is where all the magic happens. This is your command center for managing your website, so let’s make sure you can access it easily.
- Open Your Browser: Start by launching your favorite web browser. You can use any standard web browser like Chrome, Firefox, or Safari.
- Go to the Login Page: Type in your website URL followed by
/wp-admin. For example, if your website iswww.example.com, you’d go towww.example.com/wp-admin. This will take you to the login page. - Enter Your Credentials: You’ll need to input your username and password. These are the credentials you set up when installing WordPress. If you’ve forgotten your password, there’s a “Lost your password?” link to help you recover it.
- Secure Access: If your website has security measures like two-factor authentication, make sure you have your phone or authentication app handy. Follow the prompts to gain access.
- Dashboard Overview: Once logged in, you’ll be greeted by the Dashboard. Here, you’ll find essential sections such as Posts, Media, Pages, Comments, and Appearance. Each of these areas allows you to manage different aspects of your site.
Now that you’ve accessed the WordPress Admin Dashboard, you’re ready to upload your XML file and import your content! Just a few more steps, and you’ll have all your data in place!
Navigating to the Import Tool
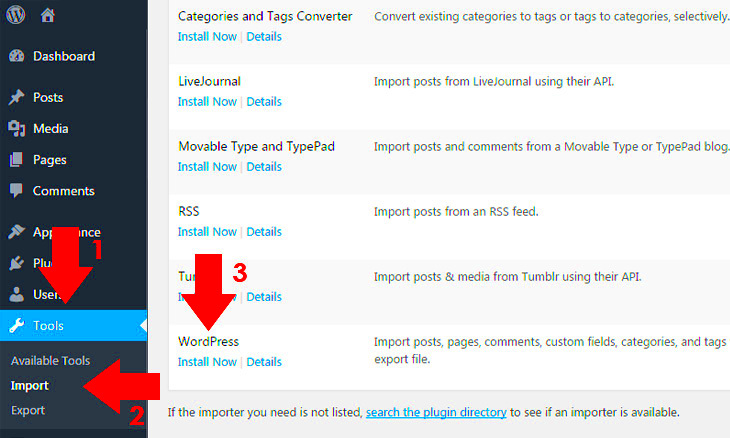
Alright, let’s dive into how you can find the Import Tool in your WordPress dashboard. It’s pretty straightforward, so don’t worry! First, you’ll need to log into your WordPress admin panel. Once you’re in, look to the left-hand side menu; you’ll be navigating through a few options to get to where the magic happens with your XML file.
Here are the steps to follow:
- From the dashboard, hover over the Tools option in the left sidebar.
- A submenu will pop up. Click on Import from this list.
Once you click on Import, you will be presented with a list of various platforms from which you can import data. That’s right! WordPress is versatile, and it recognizes several formats.
Now, what you’re specifically looking for is the option that mentions WordPress. This is crucial because it’s tailored for importing your .xml files. You’ll see a button that says Install Now next to it if you haven’t installed the Importer yet. Go ahead and click that. This will only take a moment.
After installing, you should see an Activate Plugin & Run Importer option. Click on it, and just like that, you’re now a step away from uploading your XML file into your WordPress site!
Uploading Your XML File
Now that you’ve successfully navigated to the Import Tool, it’s time for the exciting part – uploading your XML file! This is where all the preparation pays off. Get your XML file ready and let’s go through the steps together.
Once you’re on the Import WordPress page, you’ll see a prompt asking you to Choose File. Clicking this will open up a window where you can browse through your files. Find your XML file, make sure it’s the correct one, and select it!
The next step is to click on the Upload file and import button. Your screen may briefly flash with a loading indicator as WordPress processes your file, so hang tight! Once it’s done, you’ll be directed to a new page where you will set some important options for the import process.
Here’s what you can do:
- Assign authors: You can assign posts to existing users or create a new user for the imported posts.
- Download and import file attachments: This is a handy option if your XML file includes media files. Make sure to check this box if you want to import them!
After you’ve set your preferences, simply click on the button that reads Submit. WordPress will now begin importing your content from the XML file. Depending on the size of your file, this may take a little time, so be patient!
Congratulations! You’ve just added an XML file to your WordPress site. How easy was that?
7. Assigning Authors and Importing Content
So you’ve created your XML file and are all set to bring your content into WordPress! The next step in this process is about assigning authors and actually importing that content. It’s a crucial part of ensuring that your posts appear under the right author, especially if you’re migrating from another platform or website.
When you import an XML file, WordPress presents you with a nifty screen that allows you to manage who the authors of the imported posts will be. Here are the key steps involved:
- Select the Importer: First things first, make sure you’re using the WordPress Importer tool that handles XML files.
- Upload the XML File: Click on the “Choose File” button and find the .xml file on your computer. Hit “Upload file and import.”
- Assign Authors: You’ll see a list of existing authors from your WordPress site as well as an option for “Import as a new user.” Here’s what you can do:
- Assign to Existing Users: Choose an author from the dropdown for each set of imported posts.
- Create New Users: If the original authors don’t match any listed here, you can also create a new user by filling in the fields provided.
- Import Attachments: There’s also a checkbox that lets you download and import file attachments associated with the posts. Be sure to check this if you want all images, videos, or other media files to transfer over!
- Finalize the Process: Once you’ve assigned authors as needed, hit the “Submit” button. And just like that, your content will begin to import!
And voilà! You’ve assigned authors and started the import process. Now, onto checking that everything went smoothly!
8. Verifying Successful Import
Once you’ve completed the import process of your XML file, it’s time for the crucial step of verification. You want to ensure all your content came through correctly because, let’s be honest, no one wants to deal with missing posts or broken links!
Here’s how you can verify that your import was successful:
- Check Your Posts: Go to the “Posts” section in your WordPress dashboard. Review the list and make sure all titles, authors, and publish dates appear as expected.
- Look for Media: Navigate to the “Media” library and confirm that any images, videos, or attachments have successfully imported. If you selected the attachment option during import, they should all be there.
- Inspect Formatting: Open a handful of posts to ensure they retain their content formatting. Double-check for paragraph breaks, images, and any special formatting.
- Permalink Structure: Check if the permalinks for your imported posts are set up correctly. Go to “Settings” -> “Permalinks” to adjust them if necessary.
- Run a Quick Search: Utilize the search bar in your posts section to quickly find some of the imported content. This is a good way to see if specific articles came through.
It’s also a good idea to ask some fellow editors or site contributors to take a peek and confirm that everything looks good from their end. When in doubt, you can also backtrack and repeat the import process, correcting any issues along the way. With all checks complete, your content is now ready to shine in its new WordPress home!
Troubleshooting Common Issues
When adding an .xml file to WordPress, you may encounter a few common issues that can disrupt your workflow. But don’t worry! Here’s a handy guide to help you troubleshoot these problems like a pro.
1. File Size Limitations
One common issue is the file size limit imposed by your WordPress installation. If your .xml file is too large, you might receive an error stating “The uploaded file exceeds the upload_max_filesize directive in php.ini.” Here’s how you can fix this:
- Contact your hosting provider to increase the upload limit.
- Edit your
php.inifile (if you have access) to modify theupload_max_filesizeandpost_max_sizesettings. - Add the following lines to your
.htaccessfile:
php_value upload_max_filesize 64Mphp_value post_max_size 64M2. Import Errors
If you see issues like “Import failed” or “XML parsing error,” this typically hints at problems within the .xml file itself. Here’s how to handle it:
- Validate your .xml file using online tools.
- Check for unsupported characters or formatting issues in the file.
- Reduce the complexity of your .xml file, if necessary.
3. Memory Exhaustion
If WordPress runs out of memory during the import, you might get an error message. To solve this, increase the WordPress memory limits by adding the following line to your wp-config.php file:
define('WP_MEMORY_LIMIT', '256M');By using these troubleshooting tips, you can swiftly tackle most issues during your import process. Remember, the WordPress community is vast, so don’t hesitate to ask for help if you’re feeling stuck!
Conclusion
In conclusion, adding an .xml file to WordPress can seem like a daunting task, but once you know the steps, it becomes a straightforward process. Whether you’re migrating a site, importing posts, or transferring settings, the .xml file has got your back! Here’s a quick recap of essential points:
- Always back up your website before making significant changes.
- Check for file size limits and ensure your .xml file is formatted correctly.
- Don’t hesitate to troubleshoot any issues that arise during the import process.
- Consult the WordPress community for additional support or tips.
By following these guidelines, you’ll find that working with .xml files in WordPress is not only doable but can also enhance your site’s functionality. So go ahead and leverage the power of .xml to manage your WordPress site effectively!
Happy blogging!

