If you’re a WordPress site owner, keeping your website secure is likely at the top of your priority list. One effective way to bolster your security is by implementing Cloudflare CAPTCHA. But what is it, exactly? Well, Cloudflare CAPTCHA is a security feature that helps to differentiate between human visitors and bots, which can protect your site from harmful automated attacks. In this article, we’ll dive into how you can easily add Cloudflare CAPTCHA to your WordPress site and explore its multitude of advantages.
Benefits of Adding CAPTCHA to Your WordPress Site
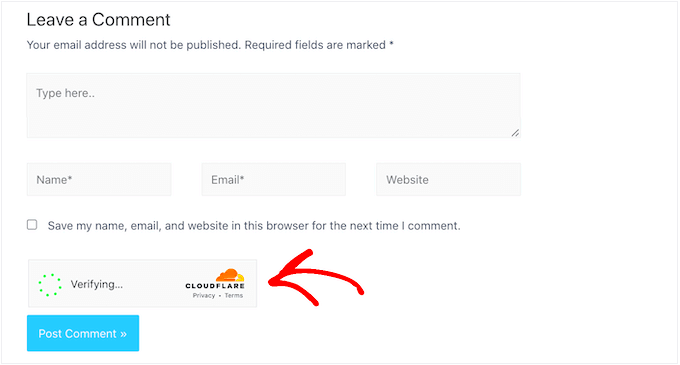
Adding CAPTCHA to your WordPress site through Cloudflare comes with a plethora of benefits. Let’s break down some of the key advantages:
- Enhanced Security: CAPTCHA helps to prevent bots from accessing your site, reducing the risk of spam, brute force attacks, and data breaches.
- Improved User Experience: By filtering out malicious bots, genuine users can enjoy a smoother experience without unnecessary distractions from spam content.
- Control Over Traffic: You get to decide how to handle various types of visitors, making it easier to manage potentially harmful traffic before it reaches your site.
- Adaptability: Cloudflare’s CAPTCHA can be customized easily according to your site’s needs, providing flexible protection levels.
- Reduced Server Load: Since bots are kept at bay, your server doesn’t have to deal with their requests, resulting in better performance and speed, especially during high traffic periods.
Incorporating Cloudflare CAPTCHA not only fortifies your security but also enhances the overall functionality and usability of your WordPress site.
Prerequisites for Implementing Cloudflare CAPTCHA
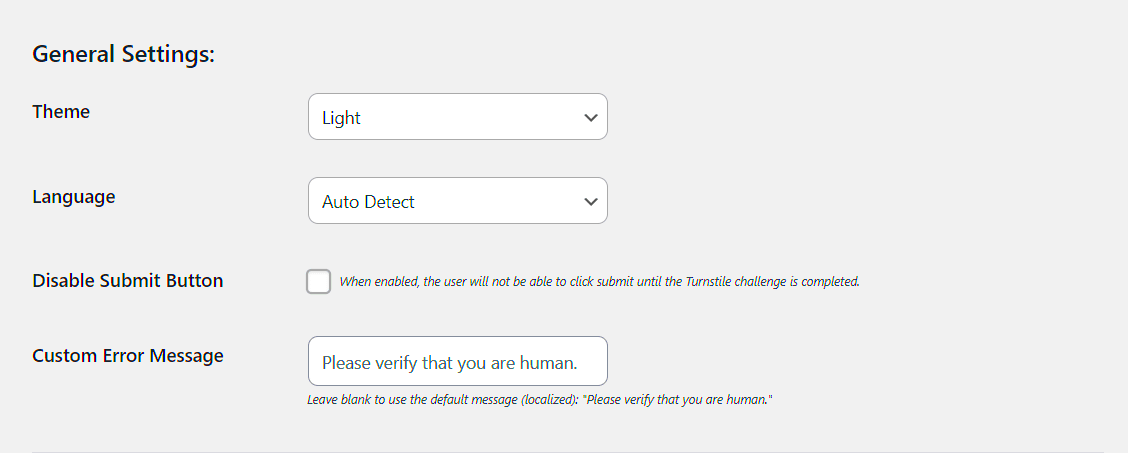
Before diving into the implementation of Cloudflare CAPTCHA on your WordPress site, there are a few important prerequisites to keep in mind. Making sure you have everything ready will save you time and headaches down the road!
- Cloudflare Account: First things first, you’ll need to create a Cloudflare account. It’s completely free to sign up, and it’s quite a straightforward process. Just head over to the Cloudflare website and register.
- Domain Setup: After setting up your account, you’ll need to add your domain to Cloudflare. This involves changing your domain’s nameservers to point to Cloudflare. Make sure you follow Cloudflare’s simple step-by-step guide to ensure a smooth transition.
- WordPress Website: Obviously, you need a WordPress website where you want to implement the CAPTCHA. Ensure your site is up and running and that you have administrator access to make the necessary changes.
- SSL Certificate: For enhanced security and functionality, it’s advisable to have an SSL certificate installed on your site. Cloudflare does offer free SSL, but you need to enable it in your account settings.
- Caching Plugin (Optional): Although not mandatory, using a caching plugin can improve your site’s performance drastically. If you’re already using one, ensure compatibility with Cloudflare.
With these prerequisites checked off your list, you’re all set to move ahead to the next steps. Trust me, having these elements in place will make your setup process smoother!
Setting Up Cloudflare on Your WordPress Site
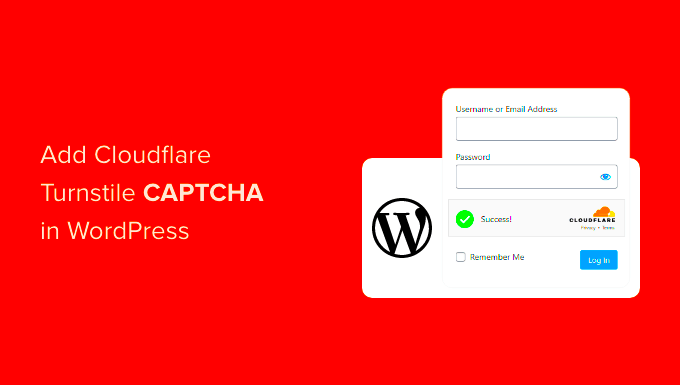
Now that you’ve got your prerequisites sorted out, it’s time to set up Cloudflare on your WordPress site. This process might seem a bit technical, but don’t worry—I’ll walk you through it step by step!
- Add Your Site to Cloudflare: Log in to your Cloudflare dashboard and click on “Add a Site.” Enter your domain name and follow the on-screen instructions. Cloudflare will scan your existing DNS records, so just review them and proceed.
- Select a Plan: Choose a plan that best fits your needs. While Cloudflare offers various plans, including a free tier, the basic features are usually enough for most users starting out.
- Update Your Nameservers: Once Cloudflare has configured your site, you will see two nameservers that you need to set at your domain registrar. Log in to your registrar’s website and update the nameservers to point to Cloudflare’s provided nameservers.
- Install Cloudflare Plugin for WordPress: To simplify managing your Cloudflare settings, consider installing the Cloudflare plugin on your WordPress site. You can find and install this plugin right from your WordPress dashboard by navigating to Plugins > Add New.
- Configure Cloudflare Settings: After activating the plugin, you can configure your Cloudflare settings from your WordPress admin area. You’ll see options to enable features such as caching and security settings, which are essential for high performance.
- Enable CAPTCHA: To activate the CAPTCHA feature, go back to your Cloudflare dashboard, select the Firewall settings, and then navigate to the “Access” section. From there, you can enable CAPTCHA for various scenarios, tailoring the security level that suits your site.
And there you have it! By following these steps, you’ve successfully set up Cloudflare on your WordPress site. Your website will now benefit from enhanced security, including the added layer of CAPTCHA protection against bots and spam. It’s a great way to ensure a safer online experience for both you and your visitors!
Configuring CAPTCHA Settings in Cloudflare

Once you’ve enabled CAPTCHA for your site via Cloudflare, it’s time to tweak the settings to fit your needs. Cloudflare offers a range of CAPTCHA options, allowing you to customize the level of protection you want without sacrificing user experience. Here’s how to get started:
- Log in to your Cloudflare account: Head over to the Cloudflare dashboard and select the website you want to configure.
- Access the Firewall settings: Navigate to the “Firewall” tab. This is where all the magic happens regarding security settings.
- Select “Settings” under Firewall: Here you’ll find various options related to how you want to handle requests to your site.
- Choose CAPTCHA Level: Cloudflare typically offers settings like “No CAPTCHA,” “Challenge” (which uses CAPTCHAs), and “Always On.” Select which best aligns with your security needs.
- Set up CAPTCHA Thresholds: You can further customize it by setting thresholds based on your website’s traffic. Higher thresholds can lead to more challenges for suspicious users.
Once you’ve made your selections, don’t forget to click on the “Save” button to implement your changes. Just like that, you’re on your way to a more secure website!
Integrating Cloudflare CAPTCHA with WordPress
After configuring CAPTCHA settings in Cloudflare, the next step is integrating it with your WordPress site. This is crucial, as you want to make sure your visitors can navigate seamlessly while still being protected. Here’s how to do it:
- Install a WordPress security plugin: While Cloudflare offers basic protection, using plugins like Wordfence or Sucuri can add an extra layer of security and help manage CAPTCHA challenges.
- Adjust settings in your security plugin: Go to the settings of your installed plugin. Look for options related to CAPTCHA or Cloudflare integration to ensure both systems are working harmoniously.
- Test the implementation: It’s essential to run a few tests. Have friends or colleagues access your site to see if CAPTCHA appears as intended. This not only assures functionality but also enhances user experience.
- Regular Updates: Lastly, make sure to keep your WordPress version and security plugins updated. This keeps everything running smoothly and effectively counteracts vulnerabilities.
By successfully integrating Cloudflare CAPTCHA with your WordPress site, you’re not just adding an extra layer of protection; you’re ensuring that your users have a secure and seamless experience while they browse your content. You’ve just leveled up your website security!
7. Testing CAPTCHA Functionality
Once you’ve successfully added Cloudflare CAPTCHA to your WordPress site, the next crucial step is to test its functionality. Testing ensures that everything works smoothly and that visitors can interact with your site without unnecessary hiccups. Here’s how you can effectively test the CAPTCHA:
1. Visit Your Website: Start by navigating to your website like a regular user. Make sure you’re logged out of your site or use a private browser window.
2. Perform Actions: Try to execute actions that would usually require CAPTCHA verification. For instance, attempt to submit a form or comment on a blog post. Observe if the CAPTCHA prompt appears as expected.
3. Different Browsers and Devices: Don’t just test on your primary browser. Check your site’s functionality across various browsers (Chrome, Firefox, Safari) and devices (desktop, tablet, mobile). This will help you ensure compatibility and functionality across the board.
4. Test Edge Cases: Consider testing scenarios that are less common, like entering incorrect data in forms or rapidly submitting requests, to see how the CAPTCHA responds.
By performing these tests, you’ll be able to verify that your Cloudflare CAPTCHA is not only working but is also providing the level of security you expect. If everything operates smoothly, you can feel secure knowing your site is better protected against automated bots.
8. Troubleshooting Common Issues
Even after implementing Cloudflare CAPTCHA, you may encounter some challenges. Don’t worry; many users face similar issues, and most of them can be resolved with a bit of troubleshooting. Here are some common problems and how to fix them:
| Issue | Possible Solution |
|---|---|
| CAPTCHA Not Displaying | Check your Cloudflare settings to ensure CAPTCHA is enabled. Also, ensure there are no conflicting plugins on your WordPress site. |
| Forms Not Submitting | Ensure the CAPTCHA is correctly configured on the relevant forms. You might need to adjust the settings or check for JavaScript errors on the page. |
| Difficulty for Legitimate Users | Adjust the behavior settings of CAPTCHA in your Cloudflare account. Sometimes, less aggressive settings can help improve user experience. |
| CAPTCHA Displaying for Logged-in Users | Modify the settings to ensure that registered or logged-in users face less CAPTCHA interference on your site. |
Additional Tips:
- Clear your site cache after making changes.
- Keep your WordPress, themes, and plugins updated to avoid compatibility issues.
- Check for documentation or community support for specific troubleshooting guidance.
If you run into trouble, don’t hesitate to reach out to Cloudflare support or consult the WordPress community forums. With a little effort, you can overcome these hurdles and keep your site secure!
Conclusion and Best Practices for Enhanced Security
Implementing Cloudflare CAPTCHA on a WordPress site is an effective strategy to combat spam, reduce bot traffic, and enhance overall security. As cyber threats evolve, it’s imperative to adopt measures that protect your website without compromising user experience. Here are several best practices to consider:
- Regularly Update WordPress: Ensure your WordPress core, themes, and plugins are always up to date to minimize vulnerabilities.
- Utilize Security Plugins: Combine Cloudflare CAPTCHA with reliable security plugins like Wordfence or Sucuri for layered protection.
- Monitor Traffic: Use analytics to monitor visitor patterns, and be cautious of unusual spikes in traffic, which can signal malicious activity.
- Employ Two-Factor Authentication: Add an extra security layer for your WordPress login by using two-factor authentication (2FA).
- Regular Backups: Create regular backups of your website to recover quickly in case of an attack.
- Educate Your Team: Ensure everyone involved in managing the website understands security protocols and best practices.
By following these best practices alongside implementing Cloudflare CAPTCHA, you can significantly enhance the security of your WordPress site, protect sensitive data, and create a safer online environment for your users.

