Thinking about turning your photography hobby into a quick cash stream? Shutterstock is one of the top platforms where photographers can showcase and sell their images worldwide. It’s a fantastic way to earn passive income, especially if you’re sitting on a collection of high-quality photos. But before diving in, it’s essential to understand how the process works, what Shutterstock expects from contributors, and how you can maximize your chances of success. Don’t worry—it’s simpler than you might think! Let’s explore what you need to know to start selling your photos and making some extra money.
Understanding Shutterstock’s Submission Guidelines
Before you upload your photos, it’s crucial to familiarize yourself with Shutterstock‘s submission guidelines. These rules are designed to ensure that the platform maintains a high standard of quality and that buyers receive premium images. Here’s what you need to keep in mind:
- Image Quality: Your photos should be sharp, well-exposed, and free of noise or artifacts. Avoid over-editing or heavy filters that distort the original quality.
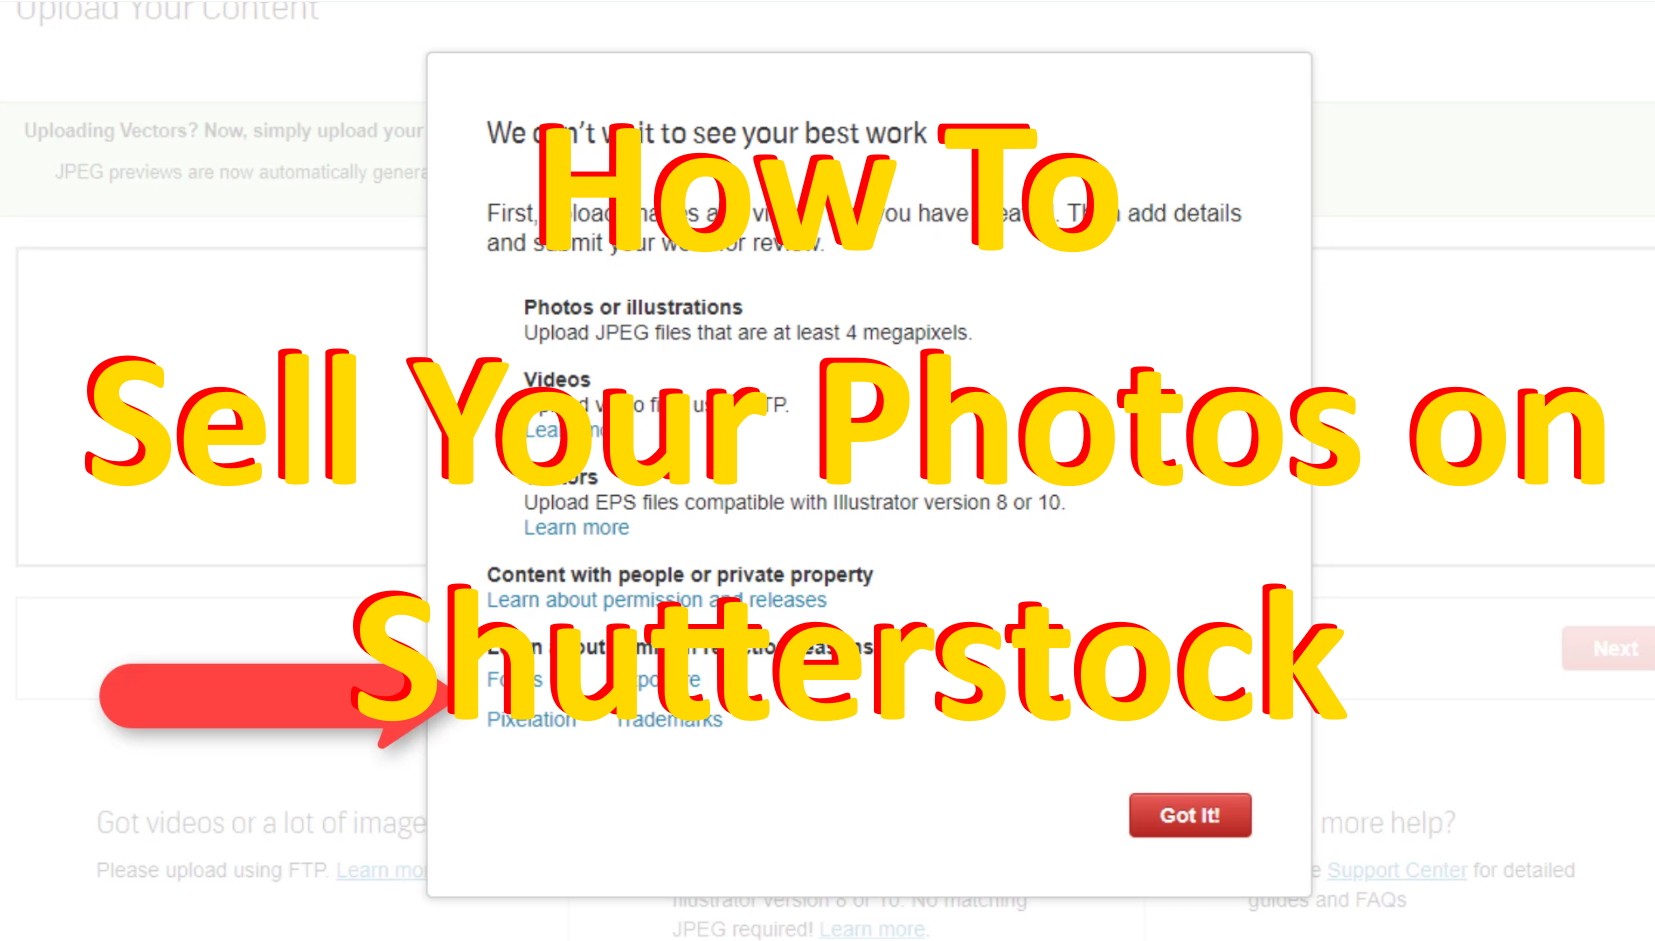
- File Format and Size: Shutterstock accepts JPEG files with a minimum of 4 megapixels (e.g., 2000 x 2000 pixels). Ensure your images are saved in RGB color mode and are at least 300 DPI for clarity.
- Content Restrictions: Shutterstock has strict rules regarding content. You can’t upload images that include copyrighted material, logos, or recognizable private property without permission. Also, avoid images with offensive or sensitive content.
- Model and Property Releases: If your photo features recognizable people or private property, you’ll need to provide model or property releases. Without these, your images may be rejected or limited in licensing options.
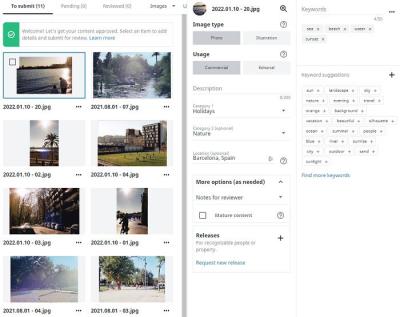
- Metadata and Keywords: Properly tagging your photos with relevant keywords helps buyers find your images. Be honest and precise—avoid spammy tags or irrelevant keywords.
Additionally, Shutterstock reviews submissions to ensure they meet quality standards. It’s a good idea to browse their contributor guidelines and sample images to get a feel for what they prefer. Remember, high-quality, relevant images that follow their rules are more likely to get accepted and sold quickly, helping you earn that quick cash you’re after!
Preparing Your Photos for Submission

Before you send your photos off to Shutterstock, it’s crucial to make sure they’re in top shape. Think of it as getting your artwork gallery-ready — you want your images to stand out, look professional, and meet the platform’s standards. So, let’s walk through some key tips to prepare your photos for submission.
First things first, resolution matters. Shutterstock recommends images be at least 4 megapixels in size, but aiming for higher resolutions (like 12 MP or more) can give you more flexibility and better chances of approval. Make sure your photos are sharp, well-focused, and free of any blurriness or pixelation.
Next up, consider the composition. Photos with clear, compelling subjects tend to perform better. Whether it’s a beautiful landscape, a candid shot of people, or a product image, make sure your shot tells a story or evokes emotion. Good lighting is also key — natural light often works wonders, but if you’re using artificial light, ensure there are no harsh shadows or overexposed spots.
Now, let’s talk about editing. Basic adjustments like brightness, contrast, and color correction can really enhance your images. Use editing software like Adobe Lightroom or Photoshop to fine-tune your photos. But remember, avoid over-editing or adding filters that drastically change the original look — Shutterstock prefers natural, authentic images.
Removing any distracting elements is also important. Check your photos for dust spots, blemishes, or unwanted objects. Cloning or healing tools can help clean up minor imperfections. Also, crop your images to the recommended aspect ratios — Shutterstock accepts a variety, but common sizes are 4:3 or 5:4.
Another critical step is to ensure your photos are in the correct format. Shutterstock accepts JPEG files with a minimum of 8-bit color, and the file size should ideally be under 50MB. Save your files with descriptive, relevant filenames that include keywords related to the content — this helps with searchability.
Don’t forget about metadata. Adding accurate and detailed titles, descriptions, and keywords boosts your image’s visibility. Think about what someone might search for when looking for a photo like yours, and include those terms naturally.
Finally, double-check the license and model or property releases if your photos include recognizable people or private properties. Having these ready can speed up the approval process and keep your submissions compliant with Shutterstock’s policies.
Creating a Shutterstock Contributor Account

Ready to start earning? The first step is creating your Shutterstock contributor account. It’s a simple process, but taking your time to set it up correctly will save you headaches down the line. Here’s what you need to do:
- Visit the Shutterstock Contributor Page: Head to https://submit.shutterstock.com. Click on “Join Now” to begin your registration process.
- Fill Out Your Profile: Provide your full name, email address, and create a secure password. Make sure your contact details are accurate because Shutterstock will use this info for communication and payment purposes.
- Agree to the Terms: Read and accept Shutterstock’s contributor agreement. It’s always good to familiarize yourself with their policies regarding content rights, licensing, and payments.
- Verify Your Email: After submitting your info, you’ll receive a verification email. Click the link to confirm your email address and activate your account.
- Complete Your Profile: Once logged in, you’ll be prompted to add some additional details like your tax information and payment preferences. Opt for PayPal or bank transfer, whichever is most convenient for you.
Now, before you start uploading, it’s a good idea to review Shutterstock’s Content Guidelines. They specify what types of images are accepted and what’s not — for example, images with excessive noise, watermarks, or inappropriate content will be rejected.
Once your profile is set up, you can start uploading your photos through the Contributor Dashboard. This platform allows you to manage your submissions, track your earnings, and see which images are approved or rejected.
Remember, building a good reputation on Shutterstock takes time and consistent quality uploads. Focus on submitting high-quality, well-prepared images, and engage with the community if you want to grow your presence and start earning quick cash from your photography skills.
Uploading Your Photos and Tagging Them Effectively
So, you’ve got a bunch of stunning photos ready to go—great! Now comes the fun part: uploading them to Shutterstock and making sure they get noticed. The key here is to upload high-quality images and tag them thoughtfully. This helps buyers find your photos when they’re searching for something specific, increasing your chances of making a sale.
First, ensure your photos meet Shutterstock’s quality standards. They prefer images that are sharp, well-exposed, and free of noise or artifacts. Use a good camera or smartphone with a high-resolution sensor, and don’t forget to do some basic editing to enhance your photos before uploading.
When it’s time to upload, follow these simple steps:
- Select your best photos—quality over quantity always wins.
- Resize and format—make sure your images are at least 4 megapixels in size, and save them as JPEGs with minimal compression.
- Fill in the metadata—this is where tagging and descriptions come in.
Now, for the most important part: tagging your photos effectively. Think of tags as the clues that help Shutterstock’s search engine understand what your photo is about. Be specific, relevant, and use a variety of keywords. For example, if you uploaded a picture of a sunset over mountains, your tags might include:
- Sunset
- Mountain range
- Evening sky
- Nature
- Scenic landscape
It’s tempting to stuff your tags with as many words as possible, but quality is better than quantity. Focus on the most relevant keywords that accurately describe the scene, objects, mood, and colors. Think about what a buyer searching for a photo like yours would type into the search bar.
Additionally, use descriptive tags for emotions, activities, or themes. For example, if your photo depicts a joyful moment at a beach, consider tags like “happy,” “vacation,” “summer,” or “family.”
Remember, well-tagged images are more likely to appear in search results, increasing your chances of making sales. Take your time with this step—it’s worth the effort!
Optimizing Your Photos for Better Visibility and Sales
Once your photos are uploaded and properly tagged, the next step is to optimize them to stand out and boost your sales. Think of this as your secret sauce for getting noticed in a crowded marketplace. A few simple strategies can make a big difference in how often your photos are viewed and purchased.
First, pay attention to your titles and descriptions. Use clear, descriptive language that includes relevant keywords naturally. Instead of a generic title like “Photo1,” try something specific like “Golden Sunset Over Mountain Lake.” This helps both Shutterstock’s algorithm and potential buyers understand what your image is about at a glance.
Next, choose the right categories. Shutterstock provides categories to classify your images—for example, “Travel,” “Business,” or “Nature.” Selecting the most accurate categories ensures your photos appear in relevant searches.
Another tip is to keep your portfolio fresh. Regularly upload new photos that align with current trends or seasonal themes. For example, during holidays, images related to celebrations or winter scenes tend to perform well.
Consider also the quality and consistency of your submissions. Buyers often browse portfolios, so maintaining a cohesive style or theme can attract repeat customers. Consistent high-quality images build your reputation and increase the likelihood of sales.
Lastly, leverage social media and personal networks to promote your Shutterstock portfolio. Share your best images on platforms like Instagram, Pinterest, or Facebook, and invite your followers to check out your work. The more exposure your images get, the higher your chances of making quick cash.
In summary, optimizing your photos isn’t just about uploading—they’re about making sure your images reach the right audience. With thoughtful titles, accurate descriptions, proper categorization, and regular uploads, you’ll improve your visibility and turn your photography passion into a steady income stream.
How to Earn Money Quickly from Your Shutterstock Photos
If you’re eager to start earning cash from your Shutterstock portfolio, the good news is that there are several strategies to get your revenue flowing faster. While building a steady stream of passive income takes time, some steps can help you earn money more quickly, especially in the beginning.
First off, make sure your photos are high quality and on-trend. Shutterstock loves fresh, clear, and eye-catching images that resonate with current market demands. Focus on popular themes like technology, business, lifestyle, or seasonal content—these tend to attract more buyers.
Next, optimize your images with relevant keywords and accurate descriptions. Think like a buyer: what would they search for? Use a mix of broad and specific keywords, and include details like location, mood, color, and subject. The better your keywords, the higher your images will rank in search results, increasing the chances of sales.
Another tip is to upload consistently. The more high-quality images you add, the more opportunities you create for sales. Set a manageable goal—whether it’s a few images each week or a batch every month—to keep your portfolio active and visible.
Additionally, consider creating collections or themed sets. Buyers often look for bundles or series, and grouping related images can boost your chances of multiple sales from a single buyer.
Don’t forget to promote your work on social media or your personal website. Sharing your Shutterstock portfolio can attract direct traffic and potential buyers, especially if you target niche markets or specific industries.
Finally, keep an eye on trending topics and adjust your content accordingly. For example, if remote work becomes more popular, upload relevant images like home offices or virtual meetings. Staying current helps you earn quicker by meeting immediate market needs.
Tips for Increasing Your Photo Sales and Passive Income
Once you’ve got the hang of making initial sales, the goal shifts toward increasing your overall income and creating a passive revenue stream. Here are some practical tips to help you grow your Shutterstock earnings over time:
- Diversify your portfolio: Upload a wide variety of images covering different subjects, styles, and concepts. This broadens your reach and appeals to a wider audience.
- Focus on evergreen content: Photos that remain relevant over time—like nature, everyday objects, or universal themes—continue to sell long after they’re uploaded.
- Use high-resolution images: Larger, high-quality photos tend to have better sales potential and can be used for commercial purposes, which often pay more.
- Leverage trending topics: Stay updated with current events, seasons, or popular themes, and upload related images promptly.
- Optimize your keywords and titles: Regularly review and refine your metadata to improve searchability. Use tools or keyword research to find what buyers are searching for.
- Participate in Shutterstock Contributor Contests: These contests can give your work more visibility and sometimes include cash prizes or bonuses.
- Set realistic goals: Track your sales and growth, and aim for steady progress. Over time, consistent uploads and optimizations lead to increased passive income.
Another powerful way to boost passive income is to repurpose your images. For instance, if you have a photo of a cityscape, consider creating different versions—perhaps with overlays, different color schemes, or cropped segments—to appeal to various buyers.
Finally, remember that patience is key. Building a reliable stream of passive income takes time and dedication. But by continuously adding quality content, optimizing your images, and staying current with market trends, you’ll set yourself up for long-term success in earning from your Shutterstock photos.
Common Mistakes to Avoid When Selling Photos on Shutterstock
Hey there! Before you jump into selling your photos on Shutterstock, it’s super helpful to know what pitfalls to watch out for. Even seasoned photographers sometimes stumble into these common mistakes, which can slow down your earnings or even get your submissions rejected. Let’s walk through some of the biggest no-no’s so you can avoid them and make your photo-selling journey smoother.
1. Ignoring Shutterstock’s Content Guidelines
Shutterstock has specific rules about what kinds of images they accept. This includes technical quality, subject matter, and legal considerations. For example, images must be in focus, well-lit, and free of noise or distracting elements. Also, they prefer original work that hasn’t been published elsewhere. Not reading or understanding these guidelines can lead to rejections or delays.
2. Over-Editing or Excessive Photoshop Work
While some editing is fine, overdoing it can make your photos look unnatural or unprofessional. Shutterstock prefers clean, natural images. Excessive filters, heavy retouching, or surreal effects may raise red flags and cause your uploads to be declined.
3. Forgetting Model or Property Releases
If your shot features recognizable people or private property, you need the proper releases. Failing to obtain and upload these legal documents can restrict the licensing of your images and reduce your potential earnings.
4. Poor Keywording and Metadata
Effective keywords are crucial for your photos to be found. Avoid vague or irrelevant terms. Instead, use descriptive, specific keywords that match the content. This helps buyers discover your images easily.
5. Submitting Low-Quality or Unoriginal Content
It might seem tempting to upload anything you’ve taken, but Shutterstock favors high-quality, unique images. Submitting blurry, poorly composed, or overused stock photos can hurt your reputation and sales potential.
6. Ignoring Trends and Seasonal Opportunities
Sticking only to what you think is “artistic” might limit your sales. Keep an eye on trending topics, seasonal themes, or current events. Uploading relevant, timely images can boost your visibility and earnings.
In a nutshell, taking care with your images, following rules, and paying attention to detail can save you a lot of headaches and help you earn more quickly. Avoid these common mistakes, and you’ll be on a much better path to success on Shutterstock!
Conclusion and Next Steps for Successful Photo Selling
Congrats! You’ve now got a clearer picture of how to sell photos on Shutterstock and avoid the common pitfalls. Remember, the key to success is consistency, quality, and understanding what buyers are looking for. The more you learn and adapt, the more your images will stand out and generate income.
So, what’s next? Here are some simple steps to keep moving forward:
- Build a portfolio: Upload a diverse set of high-quality images that showcase your skills and style.
- Research trends: Stay current on popular themes and seasonal opportunities to maximize sales.
- Optimize your keywords: Use specific, relevant tags to improve discoverability.
- Engage with the community: Join forums, groups, or social media communities of stock photographers to learn and share tips.
- Analyze your performance: Review which images sell best and focus on creating similar content.
- Stay compliant: Regularly review Shutterstock’s guidelines and update your releases as needed.
Remember, patience pays off. Building a successful stock photography side hustle takes time, but with dedication and a strategic approach, you can turn your passion for photography into a consistent income stream. Keep shooting, keep learning, and soon you’ll see your photos making waves—and cash—on Shutterstock!