Creating a staging site is a crucial step in maintaining a robust WordPress website. Think of it as a safe playground where you can test changes without affecting your live site. In this post, we’re diving into how to push a staging site to production without overwriting your database. So if you’ve ever been hesitant to make changes for fear of messing things up, fret not! This guide will help you navigate through the process seamlessly.
Understanding the Importance of Staging Sites

Staging sites serve a vital role in the web development lifecycle. Here’s why they should be a staple in your WordPress toolkit:
- Risk Mitigation: A staging environment allows you to experiment without any risk. You can install new plugins, update themes, or modify code, all without the fear of breaking your live site.
- Testing Ground: It’s the perfect place to test new features or changes in a controlled setting. This gives you the confidence to roll out updates knowing that they function correctly.
- Team Collaboration: If you’re working with a team, staging sites facilitate collaboration. Team members can test features independently without impacting the main site.
- Review and Feedback: You can share the staging site with clients or stakeholders for feedback before the final rollout. This helps in refining the changes based on their inputs.
- Performance Testing: You can assess how new changes will affect site performance, ensuring that speed and functionality remain optimal.
In a nutshell, staging sites become an indispensable tool for anyone serious about maintaining a professional, bug-free website. Now, let’s get into how to move changes from your staging site to your live site while safeguarding your database!
Pre-Requisites for Pushing a Staging Site
Before you dive into the world of pushing a staging site in WordPress, it’s essential to have a solid foundation. These prerequisites will ensure that you’re well-prepared and reduce the chances of hiccups in the process. Let’s break it down:
- Access to Your Hosting Panel: Ensure you have administrator access to your hosting control panel. This is where you’ll be managing your files and databases.
- Backup Your Initial Database: Before you push any staging site, make it a habit to create a complete backup of your live site. This way, you can always revert back if something goes awry.
- File Transfer Protocol (FTP) Client: Install an FTP client like FileZilla. This will allow you to transfer files between your computer and the server seamlessly.
- Staging Site URL: Know the URL of your staging site. This is where all the changes will be coming from.
- Database Management Tool: Familiarize yourself with tools like phpMyAdmin. This will help you manage databases more effectively.
- Version Control (Optional): If you’re comfortable with Git, consider using it to keep track of changes. This isn’t mandatory but can be a lifesaver in some scenarios.
Once you confirm that you have all the above checked off your list, you’re ready to push your staging site without overwriting your database. It pays to be prepared, and these steps set you up for success!
Methods to Push a Staging Site Without Overwriting the Database
When it comes to pushing a staging site in WordPress, ensuring that you don’t overwrite your live database is crucial. Fortunately, there are several methods to achieve this. Let’s explore some of the most effective approaches:
- File Syncing via FTP: Use your FTP client to download your staging site’s files and upload them to your live server. Be mindful to avoid syncing the wp-content/uploads and wp-config.php files if they contain live site data.
- Using a Plugin: Plugins like WP Migrate DB Pro or All-in-One WP Migration allow you to export your staging site’s database and selectively migrate it. During this process, you can change URLs and not overwrite existing tables.
- Manual SQL Import: Manually export only the necessary tables from your staging database using phpMyAdmin and import them into the live database without overwriting existing data. Be careful to only update the relevant tables!
- Using WP-CLI: If you’re comfortable with command-line tools, WP-CLI can be a powerful ally. You can run commands that allow specific database updates or file transfers without compromising your existing database.
Choosing the right method often depends on your comfort level and the specifics of your staging setup. Always remember to back up your live site before you make any changes. Happy pushing!
5. Using a Staging Plugin for a Smooth Transition
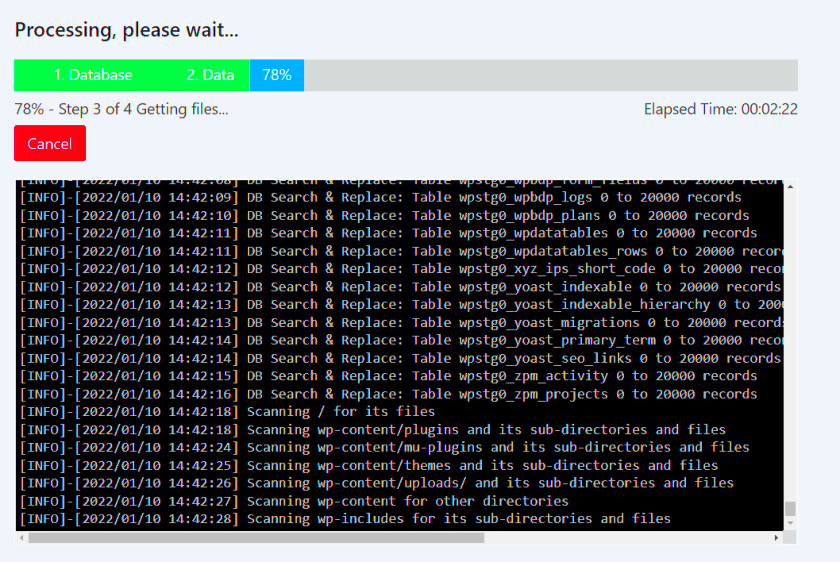
When you’re working with a WordPress site, pushing changes from a staging environment to live can be a bit tricky. That’s where staging plugins come into play! They exist to make your life easier by creating an intermediate area where you can implement changes without affecting your live site. When you’re ready to transition, these plugins ensure a smooth process without overwriting your precious database content.
Here’s how using a staging plugin can help streamline your transition:
- One-Click Deployment: Most staging plugins offer a one-click solution for pushing changes. This means you do more than just save time; you reduce the chances for human error!
- Database Protection: These plugins often come with built-in features that allow you to selectively push files and changes, protecting your database from inadvertent overwrites.
- Visual Comparisons: Some plugins even allow you to compare your staging and live site side-by-side, so you know exactly what will change.
- Roll Back Options: If something goes wrong, you can easily roll back to the previous version, minimizing downtime and headaches.
- Easy Integration: Many popular plugins, like WP Stagecoach and Duplicator, are designed to work seamlessly with a variety of hosting providers.
So, if you want to ensure a seamless transition from staging to live, don’t underestimate the power of a good staging plugin. It’s a small investment of your time that pays off significantly in reduced risks and increased efficiency!
6. Manual Migration Process
While using a staging plugin is a popular choice, sometimes you might prefer the good old manual migration process. Manual migration gives you complete control over what gets pushed live, particularly when you want to avoid overwriting the database. Let’s dive into how you can do this effectively!
Here’s a step-by-step outline for a manual migration process:
- Backup Your Live Site: Always, and we mean always, start by backing up your live site. Use a tool like UpdraftPlus or your hosting provider’s backup options to ensure you can revert changes if needed.
- Export Your Files: Use an FTP client (like FileZilla) to access your staging site files. Perform a selective download of the files you wish to push to the live site—think theme files, plugin folders, and uploads.
- Upload Files to Live Site: Once you’ve exported your necessary files, use the FTP client again to upload these files to your live site. Make sure you follow the same directory structure!
- Handle the Database with Care: Instead of overwriting your entire database, export specific tables. You could use phpMyAdmin to do this. Always remember to create a database backup before proceeding to avoid data loss.
- Import and Test: Finally, import the specific tables into your live site’s database. After that, clear your site cache and test extensively to make sure everything functions as intended!
While it may seem tedious, the manual migration process ensures that you maintain complete control over what’s pushed live. It might take a bit more time, but when done correctly, it’s a reliable method to transition your WordPress staging site without overwriting the database. Happy migrating!
Using Command Line Tools for Deployment
When it comes to deploying a staging site in WordPress, using command line tools can streamline the process significantly. If you’re comfortable with the command line, it opens up a world of possibilities for automating your deployments and ensuring a smooth transition from staging to production without messing up your database. Here’s how to make the most of command line tools for deployment:
- WP-CLI: WordPress Command Line Interface (WP-CLI) is a powerful tool that allows you to manage your WordPress sites through the terminal. With it, you can easily push files and even database changes if required. To deploy, you can use commands to export your database, copy files, and more.
- SSH: Secure Shell (SSH) lets you connect securely to your server. By using SSH, you can execute file transfers with commands like
rsync, ensuring that only changes are sent, rather than overwriting the entire site. - Git: If you use version control systems like Git, consider deploying your staging site by pushing changes directly from your local repository to the server. This way, you can keep track of every change and roll back if needed.
- Deployment Scripts: Writing custom scripts can help automate the deployment process. You can create a script that handles file transfers, checks for certain preconditions, and even performs post-deployment tasks.
Overall, command line tools not only enhance efficiency but also provide greater control over your deployment process, minimizing the risk of accidentally overwriting important data.
Post-Push Cleanup and Best Practices
After you’ve successfully pushed your staging site to production, it’s crucial to perform a thorough cleanup to ensure your site runs smoothly and securely. Here are some best practices to consider:
- Clear Caches: If you’re using any caching plugins or services, clear the cache after deployment. This ensures that your users will see the most up-to-date content.
- Review and Update Plugins: Check your plugins for updates. It’s common for newer versions to occur in staging which may not be reflected in your live site.
- Test Functionality: Conduct a thorough testing session by navigating through your site and testing key functionalities. This will help you catch any potential issues early on.
- Update URLs: If your staging site had different URLs, make sure to update them to reflect your live site. Use tools or plugins specifically designed for this purpose.
- Set Up Monitoring Tools: It’s wise to implement monitoring solutions to keep an eye on site performance and errors that might arise post-deployment.
Following these post-push cleanup steps and best practices can help ensure that your WordPress site not only functions smoothly after deployment but also remains secure, user-friendly, and efficient.
Troubleshooting Common Issues
When pushing a staging site in WordPress, it’s not uncommon to run into a few snags along the way. Don’t worry, though! Most issues are easily fixable with some straightforward troubleshooting steps. Here are some common problems you might encounter and how to tackle them:
- Broken Links: After migrating changes, you may find that some links are not working. This could be due to the URLs not being updated. You can run a search and replace tool, either through a plugin or using SQL queries in phpMyAdmin, to fix these links quickly.
- Missing Images: If images are not displaying correctly, check the file paths. Ensure that the media library URL points to the live site, and consider re-uploading images if necessary.
- Theme and Plugin Compatibility: Some themes and plugins may not function as expected after migration. Make sure all plugins are updated and check the theme settings to ensure everything aligns properly.
- Performance Issues: A dip in website performance after migration can be frustrating. Clear your cache and optimize your database. Tools like WP Rocket or WP Super Cache can be lifesavers!
- Access and Permissions: Sometimes, you may encounter access issues with certain pages post-migration. Check your file permissions (usually 755 for folders and 644 for files) and adjust as needed.
If you encounter an issue you’re unfamiliar with, the WordPress support forums are a fantastic resource. Just remember to be patient; troubleshooting can often lead to better understanding and improved performance of your site!
Conclusion
In summary, pushing a staging site in WordPress without overwriting the database is not only possible, but it’s also a great practice to maintain your workflow and keep your live site intact. By carefully managing your files and database, you can ensure a smooth transition with minimal risk of disruption. Here’s a quick recap of what we discussed:
- Backup is Key: Always start by making a full backup of your live site and database to safeguard against data loss.
- Coding Practices: Implement best coding practices and version control to keep track of your changes.
- Examine Database: Pay careful attention to what data needs to be moved over — often, you may only need to sync specific custom tables.
- Careful Testing: After migration, thoroughly test your site to catch any issues before announcing updates to users.
Remember, the key to successfully pushing a staging site is to be methodical and thorough. With these practices in mind, you’ll set your site up for long-term success. Now go ahead and confidently manage your WordPress sites with ease!


